Friday, August 26, 2011

Making waves

Hello! I made this 2 pager for a challenge over at Scrapbook.com to make waves on your LO. I made this entirely out of cardstock. I started with white for the background and did a lot of inking and water distressing.To make the waves, I used 3 different colored blue cardstocks which were inked first with distressing ink, and cut strips using some decorative scissors. Then I wet the waves and shaped them. After they were dry I added rock candy stickles to the tops.
Here's a close-up of the waves.
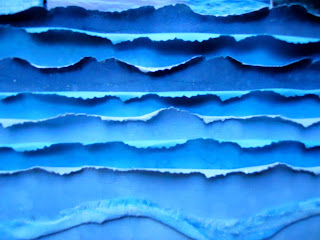
TFL! Have a great weekend!

Tuesday, August 23, 2011

Brown Paperbag Birdcage Tutorial

Hello everyone! I just finished a DT challenge for Pages in Time, where we had to use a birdcage. Even though I have quite a few birdcages on some of my Cricut cartridges, I kept picturing this woodsy, twiggy birdcage. So I decided to make one myself. Here's my page. I chose this photo of me, my dad, and brother from last Father's day.I did a lot of water distressing and machine stitching on here. I masked 2 of the birds and the barbed wire.Now for the tutorial!
Here's what you'll need.
Brown paper bag
Decoupage glue
Fast Grab Tacky Glue or Glue Gun
Distress ink (Walnut Stain)
Beige embroidery floss

First tear strips from your paper bag measuring about 4-5" long and 1/2-1" wide. You'll need 8 of them.Then ink both sides with Walnut Stain distress ink.
Now drench your strip into the decoupage glue and starting on one long end, start rolling your twig together. Do this for all your pieces.
As it starts to dry, it's still pliable which helps to shape your twigs.To make the outside frame, start with your longest pieces and curve them inward towards the top. Glue at the top.I used Fast Grab Tacky Glue, but I'm sure a glue gun would work great too.
Slightly curve your next two pieces and glue at the top.
 For the middle, I start with a straight long piece, and slightly curve in two more  pieces gluing on each side on the top.
Now glue the center into the frame of your birdcage.
Glue your bottom twig, cutting 2 small pieces for your opening.
Now you can trim the excess twigs with scissors. Take your embroidery floss and secure the bottom end pieces in a X. On top I just wrapped and glued the floss around the cage.
Now add your small twigs on the bottom in between 2 twigs to make your opening. Then wrap your embroidery floss making more X's.
Now you can leave it as it is, or decorate how you want. I added some green fiber, but little flowers would look great too. I also think painting your twigs white would give it a completely different look. So experiment and have fun! Here's a close-up on my LO.


Thursday, August 18, 2011

Pages in Time Thursday Sketch of the Week 8.18-25

Hello! Here's the Thursday Sketch of the Week for Pages in Time.
Here's my take. I just LOVE these adorable photos of my brother with his son! I used a texture medium and some stencils to make the yellow stars.


Wednesday, August 17, 2011

Hot August Nights

Hi everyone! I just finished my entry for the 2 page sketch challenge over at Scrapbook.com. Here's the sketch.
Here's my take.
I'm also entering this into the August Monochrome challenge to use fire engine red, with silver and black accents. The lines of stripes are actually black and silver metallic paper. The writing that reads, Reno, Nevada is actually a red metallic paper. It's hard to see in this scan.I also used a silver Sharpie to outline the banner, the marquis behind the journaling, and the Reno, Nevada marquis.Thanks for stopping by!


Tuesday, August 9, 2011

The Color Room Palette #70

I decided to try this clean and fresh color palette at the Color Room. Here are the colors.
Here's what I did. I used an old photo of me in Hawaii and added all kinds of flowers. The white and pink paper flowers were a RAK from my sweet friend Stacey Schwiet that she made herself. They look just like the flower I had in my hair. This is also my example for the stamping challenge that I'm hosting at Pages in Time. I stamped the journaling piece, the floral border, and fern border around the photo. TFL!


Saturday, August 6, 2011

Bunting Banner Tutorial and Contest

I did this page for a really cool challenge at Scrapbook.com inspired by the painted bunting bird. We had to use bright red, green, and blue, use paint, and make a bunting banner.I struggled with my bunting for a couple of hours before I finally figured it out. So I thought I'd share my technique with you.
Supplies you'll need.
Cardstock in 2 different colors
glue
stylus
ruler
Cricut
Button
white embroidery thread

First you'll need to cut your ovals. For this tutorial I'll be showing you how to do one scallop. For each oval you'll get 2 scallops. I cut my ovals with my Cricut machine at 2 3/4" for the blue oval and 1 3/4" for the green oval.
Then glue the green oval in the middle of the blue one.
Use your cutting tool to slice down the middle lengthwise. You now have 2 scallops to work with.
Next you'll want to use your stylus and ruler to make your creases. I start by scoring my scallop with a line down the center.
Then I score all of my lines making them slightly narrower towards the green center.They should look like this.
Then I fold the scallop in the center before making all my creases, folding it like a fan.
Then use some glue or a glue gun to glue the green center folds together creating a radiating effect.I then used white embroidery floss to stitch the X in the middle of my button. Glue your button towards the green center overlapping the button a little. I stitched the red and green line using my twisted stitching technique that I've shared here on my Blog hop post.Here's a close up.

So now that you know HOW to make a bunting banner, I'd love to see yours. If you try this technique just send me an email drea313s@yahoo.com and I'll post it here on my blog. Leave me a comment and become a follower, if you aren't already, and I'll pick a random winner to receive some of my hand made embellies. I know school will be starting again soon, so I'll give you until September 15th to play along.

Thursday, August 4, 2011

Sketch of the Week 8.4.11

Hello everyone! It's time for the new sketch of the week designed by Traci Thiel for Pages in Time.Here it is.

Here's my take.
I glimmer misted over the tree stencils and used paint and mist over the cardboard.The flowers I made out of cotton fabric using this tutorial from my dear friend Wendy G.
http://wendysscrappincorner.blogspot.com/2011/06/tutorial-grunge-delight.html

Wednesday, August 3, 2011

Stamping Challenge

Wow! I can't believe we're already in August! This summer sure is going quickly. I remember my New Year's scrappy resolution was to start using my stamps more often. I've even been buying more stamps to get me inspired. So I decided to host a stamping challenge at Pages in Time, and would love to see you there!
http://pagesintimestoresite.ning.com/forum/topics/august-stamping-challenge

Thursday, July 28, 2011

Mini Wildflowers

Hello! Here's the new Thursday sketch (week of July 28th)  from Pages in Time, designed by Traci Thiel. I really LOVE this sketch, and had a lot of fun using it!
Here's my take. I decided to flip the sketch to suit my photos better.
I made all the flowers myself. The larger flowers were inspired by Lisa Gregory's Peeled Paper Poppies.http://what-a-beautiful-mess.blogspot.com/2011/01/peeled-paper-poppies-tutorial.html I didn't have the punches that she used, so I hand cut all the petals out of cardstock, which was first glimmer misted. I also didn't peel my petals, but chose to make 10 instead of  5 gluing the petals together near the stems. For the centers I used my Cricut (Mother's Day bouquet) and some orange felt flower brads.
To make the mini wildflowers you'll need this Martha Stewart punch. I'm not sure what it's called though. You'll also need some yellow cardstock, glue, Wild Honey Distress Ink, blending tool, a stylus, foam pad or old mouse pad, and a small bead for the center. I used a brown one.

You'll need to punch 2 large flowers and 2 small ones out of yellow cardstock.
Then use your blending tool to ink the edges with your distress ink.
Then with your foam pad underneath, use your stylus on each petal starting from the center and working out. Just keep going back and forth until your petals naturally shape themselves.
Now you can glue your layers together. For the larger flowers I stacked them directly on top of eachother, and for the smaller ones I alternated the petals.
To finish it off just add your bead in the center. Here's a close-up.
I hope you enjoyed this tutorial!Thanks for visiting!


Saturday, July 23, 2011

Beach Babe

I made this for the July 2 page sketch challenge at Scrapbook.com. Here's the sketch from 2 peas in a bucket.
Here's my take.
I made the flowers from fabric which I got from this tutorial.They're very easy and simple to make.
http://pinksuedeshoe.com/2010/06/25/scrap-flower-tutorial/

Wednesday, July 20, 2011

Dictionary Flowers

I've been playing in the Color Room again! Here's palette #67.
Here's what I did. I edited this photo of my sister in black and white, but left her eye color.

Trust me. The colors look much better in real life! I made all the flowers myself. I thought I'd show you how to make the largest dictionary flower.
Here's what you'll need.
1. Retro flower die ( I used the Mother's Day cartridge for my Cricut).
2. Black soot distress ink
3. Chalks or Glimmer mist
4. Glue
5. Spray bottle with water
6. Pearl or rhinestone for the center

First I cut my flowers with my Cricut using paper I tore from a dictionary.
2 at 2 1/2", 2 at 2", 2 at 1 1/2", and 3 at 1".
Then I inked around them with my black soot distress ink.
Then I applied chalk. I wanted a more subtle look, but this would also look great sprayed with some glimmer mists.
Then spray each flower with your water bottle and shape your flowers to curve up. I like to use my heat gun.
Then just glue all your petals together starting with the largest one on the bottom.
Finally add your pearl.I made the smaller flowers using the same flower die. I just crunched and tightened the middle petals more to form a bud.
Thanks for stopping by!

Saturday, July 16, 2011

Birthday card!

I hope everyone's having a great weekend! I'm getting ready for a hike at one of my favorite trails, and then off to my brother's house to celebrate his birthday. I'm planning on getting lots of great photos today. The weather should be perfect too. Not too hot, and not too cold. Just the way I like it. Here's the card I made for my brother.

Wednesday, July 13, 2011

Distress Embossing Flowers

Hello! I finally finished this LO I've been working on for the July Monochrome challenge at Scrapbook.com. We had to use turquoise with silver as a twist. While working on this page I came up with these flowers that I wanted to share with you.
Here's my finished LO. It's a photo of me and my mom on Easter Eve getting things ready for the holiday.
First I want to thank Gabrielle Pollacco for the awesome tutorial on making these faux turquoise stones! I had to throw many stones away before getting the right look, so don't be intimidated to try. Here's a link to her tutorial. http://gabriellepollacco.blogspot.com/2010/01/tutorial-how-to-make-faux-polished.html
Now on to mine. Here's what you'll need to make these distress embossed flowers.
1. White and Black cardstock
2. Distress Embossing Ink
3. Distress Embossing Powder in Broken China
4. Silver Embossing Powder
5. Heat Gun
6.Turquoise Stickles
7. Bling or something for the center.
8. Crochet hook or small paintbrush to help shape the flowers

First cut out your flower dies. I used my Cricut Mother's Day Bouquet to cut these. For the large flower I cut 3 flowers from white cardstock at 3 1/2", 2 1/2", and 1 1/2". From the black cardstock I cut 3 at 1" for the center of my flower.
Then I pressed my white flowers into the Distress embossing ink, and used  Broken China Embossing powder on it. Don't forget to use your heat gun. You can get different looks depending on how heavy you want the embossing. For my large flower I went lightly so you can still see alot of the white cardstock. For the smaller flower I used more embossing powder.
Then shape your flower petals. I used a small paintbrush in the middle of the petals and curled them up. Then I used the crochet hook to curl the edges down. Then you pinch the petal together trying not to crease it. Your flowers should look like this.
I love the way they look just like this, but for my project I wanted alot of shimmer so I added stickles to the edges of the flowers in turquoise.
Now for the centers. Use your silver embossing powder on the black flowers. I used tweezers to hold down the centers while heating it, so it won't fly away.

Curl all your petals and glue together alternating your petals so they're not directly on top of eachother. Then add your bling.
Now glue your white embossed flowers together in the same fashion adding your center. There's so many looks you can get with this technique. I'd love to see your version.