
I had so much fun playing with my mists and sprays on my last Easter Flower Tutorial, that I did another version using the Serenade Cartridge for the Cricut Expression, on this card that I made for my Mother-in-law! We're celebrating Mom's this week at Red Rubber Inspirationals, with Inspirational #118, hosted by Kendra, to make a Mother's Day card with a sentiment of Mom, Mother, or Mother's Day stamped on it. Be sure to check out the beautiful creations the Inspiration Team came up with.

I started with some white cardstock and Distress Inks. Then I used water directly on my Well Defined Backgrounds stamp. You can't tell that's it text but it left a cool design. I did the same thing with my Aged Ornaments stamp on the top right, then used Belle Rose Palette Ink, and stamped it on the right side, slightly overlapping the water stamp. Then I added the cameo, which were clip on earrings, that once belonged to my Mother-in-law's Mom. I was so lucky to inherit a lot of her old jewelry, among other things! Using the same pink ink, I stamped the row on the bottom right with Fanciful Vintage stamps. I stamped HAPPY on the orange ribbon using Sophisticated Sentiments, and Orangerie Palette Ink. Mother's Day was stamped with Belle Rose using Contemporary Greetings, all from Red Rubber Designs.

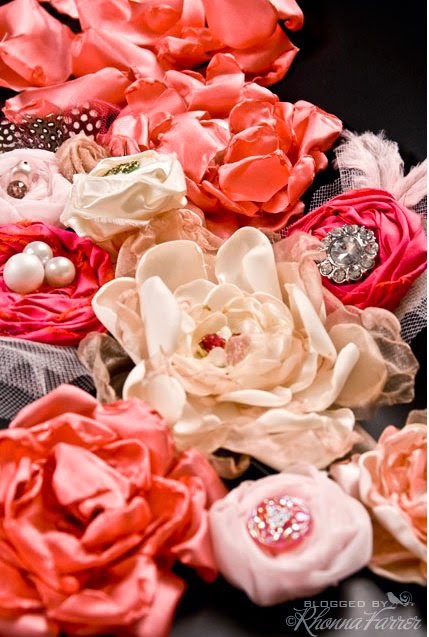
I took my inspiration from this photo used for the May Card Challenge @ Scrapbook.com. I just LOVE these colors!!


I started with some white cardstock and Distress Inks. Then I used water directly on my Well Defined Backgrounds stamp. You can't tell that's it text but it left a cool design. I did the same thing with my Aged Ornaments stamp on the top right, then used Belle Rose Palette Ink, and stamped it on the right side, slightly overlapping the water stamp. Then I added the cameo, which were clip on earrings, that once belonged to my Mother-in-law's Mom. I was so lucky to inherit a lot of her old jewelry, among other things! Using the same pink ink, I stamped the row on the bottom right with Fanciful Vintage stamps. I stamped HAPPY on the orange ribbon using Sophisticated Sentiments, and Orangerie Palette Ink. Mother's Day was stamped with Belle Rose using Contemporary Greetings, all from Red Rubber Designs.
I took my inspiration from this photo used for the May Card Challenge @ Scrapbook.com. I just LOVE these colors!!
This is also my take on Cardabilities, sketch #98.
To make the flowers cut flower #2 on the Serenade Cricut cartridge out of white cardstock.
2 at 1 1/2"
1 at 1 1/4
1 at 1"
1 at 3/4
Then mist your flowers in one to three different colors of mists or sprays. More than three might come out a little muddy.For this demonstration I made the light orange flower on the right side of the large cream Prima flower, by using Lindy's Stamp Gang sprays (Hog's Wart Orange and Clam Bake Beige). Crumple and open, leaving the smallest one slightly closed for your center bud.
As usual, layer and glue your flower together, starting with the two larger flowers on bottom, and finishing with the smallest in the center. Here's a closer look.
Thanks for looking! I hope you enjoyed the weekend!


Beautiful card! Thank you for playing with the sketch Cardabilities.
ReplyDeleteBeautiful Card!
ReplyDeleteI love the tutorial!
Thanks for join us at Cardabilities!
Kissies,
Sara
http://beescrapbooking.blogspot.pt/
This is a stunning card Drea. Love all the details and your color choices are just awesome!!!
ReplyDeletethis is so pretty and i love the added cameo :) Thanks so much for joining us on Cardabilities.
ReplyDeleteWow! Such a beautiful card!!
ReplyDeleteSo sweet and beautiful card! Thanks for playing along with us at Cardabilities! :)
ReplyDelete~Olga Kovalchuk
Super card!Thanks so much for joining us on Cardabilities.
ReplyDelete