Showing posts with label Ranger Dyan Reaveley's Dylusions Paints. Show all posts

Monday, October 22, 2018

Color Day Book ~ FotoBella DT

     Happy National Color Day! I made a mini book ( 4 1/8" X 6 1/8") to demonstrate some color terms and combinations made with stamping and Dylusions Paints from FotoBella.com.


      I started with white cardstock filled with stamping done with an old rubber stamp and the Prima Marketing (Garden Fable) Stamp, using Ranger Archival (Jet Black) Ink. Then it was adhered to my book, recycled from a cracker box, and made into the pages that fill it. For the cover, I embossed the Prima Marketing (Circle Stitches) Stamp with Ranger (Rainbow Sparkle) Embossing Powder, also used on the stitching on the spine, stamped with the Bo Bunny (Stitches) Stamp, and the color wheel stamped with the Prima Marketing (Old Town) Stamp. To mimic a stained glass window, I painted it with Dylusions Paints, and gave it two more coats of embossing powder for some sparkle and shine. 


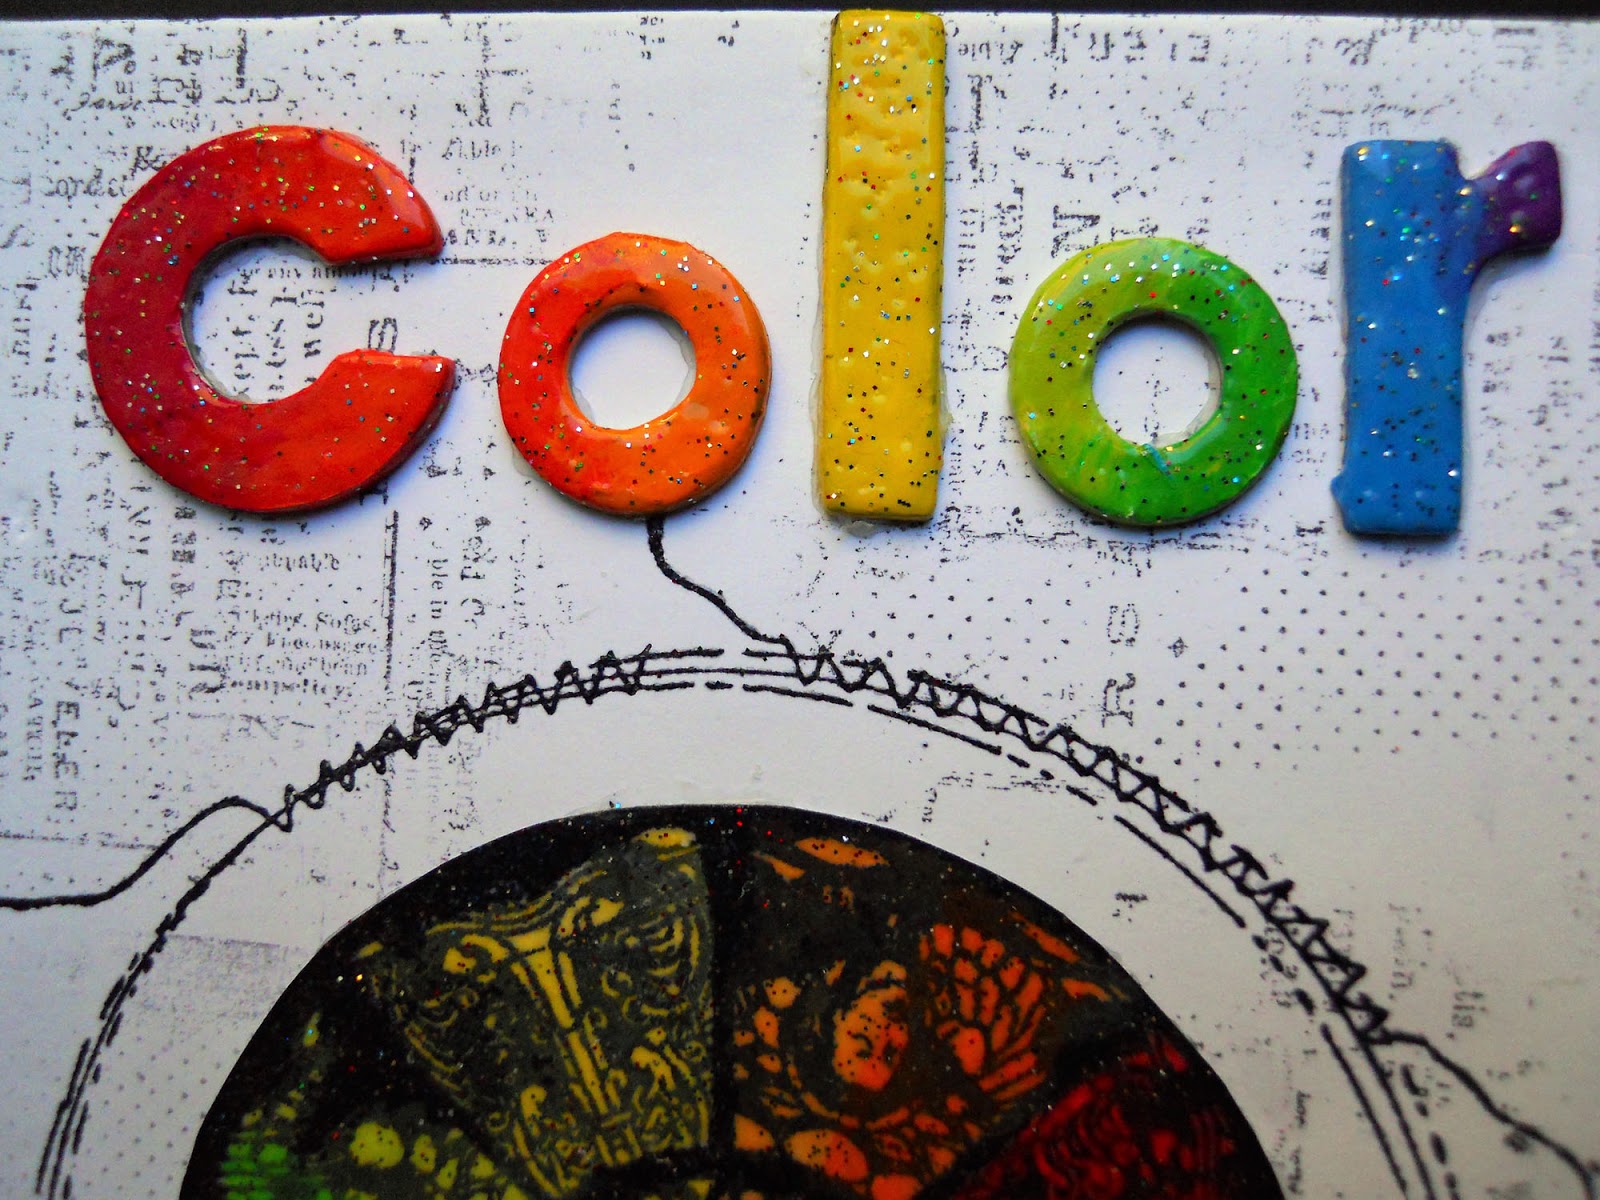
     The title was done with some old Thickers that I covered with Prima Marketing White Gesso, painted with Dylusions Paints, and coated again with the same embossing powder.


     This was my first attempt at hand-stitching my binding, done with a strong white thread that glows in the dark. 


     The splats were done with a stencil and Blending Tool, using White Linen, After Midnight, and Black Marble Dylusions Paints. To enhance the white splat and make it visible, I embossed it with (Rainbow Sparkle) Embossing Powder.


     The color terms, definitions, and color wheels were printed onto white cardstock. In this example, the color wheel shows purple and yellow as Complementary colors, but here I used Tangerine Dream and Polished Jade Dylusions Paints instead. 


     On this spread I used primary colors for my Triad, with Cherry Pie, Lemon Zest, and London Blue Dylusions Paints. 


     The paintbrushes were stamped with the Prima Marketing (The Archivist) Stamp, colored with (Brushed Pewter) Distress Spray Stain, and the background done with the (Garden Fable) Stamp


     I love these Analogous Colors together using Fresh Lime, Cut Grass, and Polished Jade Dylusions Paints!


     All of the enamel dots on the color wheel were painted with my finger to match the splats, and coated with Ranger Glossy Accents. The strip under the color wheel was stamped with the Prima Marketing (The Archivist) Stamp. 


     This Split Complementary color combo was made with Postbox Red, Crushed Grape, and Fresh Lime  Dylusions Paints. 


     Finally, I used Lemon Zest, Crushed Grape, Squeezed Orange, and Calypso Teal Dylusions Paints for this Double Complementary scheme. 


     Thanks for looking, and shop by Color at FotoBella.com!

*****************************
Challenges Entered:


Mix It Up Challenge ~ Anything Goes + Monochrome (My first two pages are Monochrome)


Saturday, May 5, 2018

Fiesta Striped Painted Blanket Tutorial ~ FotoBella DT

     Happy National Scrapbook Day and Cinco de Mayo! I'm back with a tutorial, inspired by these two holidays, featuring Dyan Reaveley's Dylusion's Paints from FotoBella.com.


**********************************
    Supplies:

White Cardstock
1/4" Masking or Artist's Tape
Tim Holtz Stripes Stencil
Tim Holtz Arrows Stencil

Directions:


1. Cut a piece of white cardstock to measure 10" X 12". Place masking or artist's tape, 1.5" from the top. Then place another strip an inch from the first one, alternating between 1.5" and 1" all the way down. If you're using masking tape, like I did here, make sure to get rid of some of the stickiness first, by placing onto clothing or carpet, so it doesn't rip the paper when peeling off. 


2. Use fingers to blend Dylusions Paints onto each masked strip. From the top, I started with Cut Grass, blending into Fresh Lime. On the next strip, I used After Midnight, blending into Calypso Teal. Then Postbox Red, blending into Tangerine Dream, and ending with Squeezed Orange, blending into Lemon Zest. Repeat the colors again, starting with the green strip, until finishing up with the red at the bottom.


3. Carefully remove the tape, and don't worry if your lines aren't crisp. As you can see, mine weren't.


4. Apply black gesso to the Tim Holtz Stripes Stencil mainly over the white stripes, and lightly dab the backside of the stencil everywhere else.


5. Apply black gesso to the Tim Holtz Arrows Stencil onto white cardstock, and fussy-cut them, adhering two to the top, and one on the left side of the page. Hand-stitch the sides with white embroidery thread.


6. Apply black gesso to the center of the page before placing photo. Adhere buttons using black and white embroidery threads.


7. Use finger to blend Black Marble Dylusions Paint into White Linen Dylusions Paint, over Bo Bunny's Lasercut Chipboard spelling Celebrate.


8. A couple of fun die cuts finished off this page, including the blue confetti piece that I painted with After Midnight Dylusions Paint.


Thanks for stopping by!

**********************************
Challenges Entered:

Try it on Tuesday ~ Stencils/Diecuts  (I used 2 of each)


Friday, September 22, 2017

Dylusions Fall Leaves ~ FotoBella DT

     Happy first day of Fall! I'm welcoming my favorite season with this 2 page spread in my art journal done with Ranger Dyan Reaveley's Dylusions Paints from FotoBella.com.


     Before spraying my pages with some water, I placed some wax paper behind them to protect the other pages. Then I used my fingers to apply Squeezed Orange, Funky Fuchsia, and Crushed Grape to the page on the right, working quickly and spraying some more, before turning the page on the left down over the paints to reveal this background. 


     Once dry, I used the Ranger Dylusions Diamond in the Rough Stencil in random places with my Mini Ink Blending Tool to apply Dirty Martini, Pomegranate Seed, Melted Chocolate, Pure Sunshine, and Tangerine Dream paints, using the same colors for the leaves.


     The leaves were done with one of my oldest stencils, but any one would do, including the Bo Bunny Falling Leaves Stickable Stencil or the Dylusions Fronds of Foliage Stencil


     To create leaves flying around, I made some with crisp paint lines, while leaving others with just a little bit of paint, fading the colors into the background with my Mini Blending Tool. Then I stamped some texture onto them with the Bo Bunny Rough It Up Stamp.


     SO much fun with these Dylusions Paints from FotoBella.com! Thanks for looking! 

**********************
Challenges Entered: