Showing posts with label Basic Grey. Show all posts

Thursday, May 24, 2018

Red Nose Day Layout ~ FotoBella DT

     Today is Red Nose Day, which is a campaign started to end child poverty. Funds raised support programs to keep children in need safe, healthy and educated, by getting and wearing your official Red Nose at Walgreens. So I'm celebrating with a layout of my adorable nephew, using an older Basic Grey Herbs and Honey Bundle from FotoBella.com.


     He's loving strawberries right now, so I spritzed Worn Lipstick Distress Spray Stain onto the background, to mimic the mess he made of his shirt. Then I applied Mowed Lawn Distress Ink with my Blending Tool, onto the edges of the green papers, and the fruit die cut below.


     The tag, scallops, and strawberry are stickers from the bundle.


     Finally I added his red nose, using Bo Bunny's Double Dot Ruby Red Jewels. Such a cutie!


     Thanks for looking, and shop by color at FotoBella.com to find all of your RED needs! Happy Red Nose Day!


Saturday, July 4, 2015

Basic Grey South Pacific Layout ~ FotoBella DT

      These adorable, older photos of my little sister have been sitting in a box just waiting for the right papers to come along, which happened as soon as I saw Basic Grey's South Pacific Collection from FotoBella!


     I created a diagonal design with the square photos, matting my fave to the pink (Fiji) paper, and machine stitching it to the yellow (New Caledonia) paper. Then I used my paper cutter to create the fringe on the bottom, which was really easy to do by following the lines on the paper, and cutting in between them. To enhance the fringe a little more, I lightly went over it with Distress Ink (Vintage Photo).


     From the pink ribbon that comes in the Ephemera, I made a loop, and added the white buttons, that also come in the Ephemera.


     To make the flowers, I used the same pink paper that I matted my photo with, and embossed them with the Enjoy The Journey Clear Stamp using Ranger's Sea Foam White Embossing Powder. Then to give them some more depth, I colored part of them with a darker pink marker, and curled my petals up. I finished it up with the title that I made from stickers. 


Thanks for looking and have a great day!


Wednesday, June 24, 2015

South Pacific "Hawaiian Rainforest" Layout ~ FotoBella DT

     This is one of the few photos I have of myself in Hawaii, at age 14, looking a little annoyed and bored because I wanted to be at the beach instead of hiking though this beautiful rainforest. Teenagers! Lol!


     I don't think I could've found a better collection to go with this photo than Basic Grey's South Pacific Collection from FotoBella! It's full of tropical colors and patterns that can go with any island photos, old or new. I started by misting the green paper with Lindy's Stamp Gang Spray (Cathedral Pines Green).Then I created the leaf border on the bottom with the Enjoy The Journey Clear Stamp, using two different shades of green ink. I also stamped HILO and the date on the banner sticker, with some old stamps. The ribbons, floral die, and buttons are from the Ephemera, which has been hand selected exclusively from FotoBella. I used the stickers to make my title, cutting and inking the rectangle alphas into a banner.


     For some added texture I added the burlap from my own stash, and hand-stitched the dark green border under the photo. Then I popped up the floral diecut to finish it off!


Challenges:
June Tic Tac Toe Challenge (I used the bottom row across.Summer theme, mixed alphas, and buttons)


Thanks for popping by yourself! 


Saturday, June 13, 2015

South Pacific Stamped Card Tutorial ~ FotoBella DT

     Here's a fun, any occasion card, with a tropical flair, featuring Basic Grey's South Pacific Collection, with fabulous goodies hand selected exclusively from FotoBella!


     For a step by step tutorial on how I gave this stamp a quilted look, please visit the FotoBella blog! This is my entry for Anything Goes at Eclectic Ellapu, which I just happily discovered.

Thanks for looking!


Sunday, June 15, 2014

Herbs and Honey Happy Father's Day Card ~ FotoBella DT

    Happy Father's Day! I just wanted to pop in real quick to share this card that I made for my wonderful Dad using Basic Grey's Herbs and Honey I want it all bundle from FotoBella. I also used this versatile bundle on my Mom's Mother's Day card. The pears on the paper that I cut out were just perfect for my Dad, since I've always called him Mon Pere, which means my father in French. I used the French phrase for Happy Father's Day using the mini alpha stickers.


    I took my inspiration from this sketch used for the June Card Challenge at Scrapbook.com.


    I used The Crafter's Workshop Well Rounded stencil to mask the circles with a golden yellow gesso. The Printed Kraft Bags were, once again, the perfect size to hold money or a gift card! I wrapped some brown sheer ribbon around it, which I had in my stash, along with the yellow rick rack.The small screws and wood stake came in the Die Cuts and Transparencies. I finished it up with machine stitching in three different colors. 


Thanks for stopping by!

Tuesday, May 27, 2014

Herbs & Honey 2 Pager ~ FotoBella DT

   It's been such a long time since I've done a 2 page LO, but these photos from my little Brother's Birthday party went so well with Basic Grey's Herbs & Honey I want it all bundle from FotoBella, that I had to do one again! Next time I won't wait so long, as I've really missed working on these!


   Between the country charm from the bundle, and this sketch used in the May 2 Page Sketch Challenge @ Scrapbook.com, the inspiration came easily.


   I added some inked cardboard behind the photo of my Brother, which I placed coming out of the Berry Sweet Printed Kraft Bags. I cut the white banner that says Oh Happy Day from the Die Cuts and Transparencies in half, and placed a sticker in between them, where I stuck BIRTH using the Alpha Stickers. Then I covered Oh with the striped Bottlecap Sticker


   I used the leftover flowers from my last Jar of Flowers Tutorial,  around the photo wreath that I made from the Snippets. For the center of the pink flower I added a Mixed Brad, along with the larger ones that I used in the date that I made from the Jumbo Kraft Numbers. I stamped the zigzag on the left and the floral border on the right, coloring the flowers with Prisma Markers. The Rasberries Wood Die Cut and red hand-stitching around the edges was the final touch!


Thanks for looking!

Friday, May 16, 2014

Basic Grey's Herbs & Honey ~ FotoBella DT

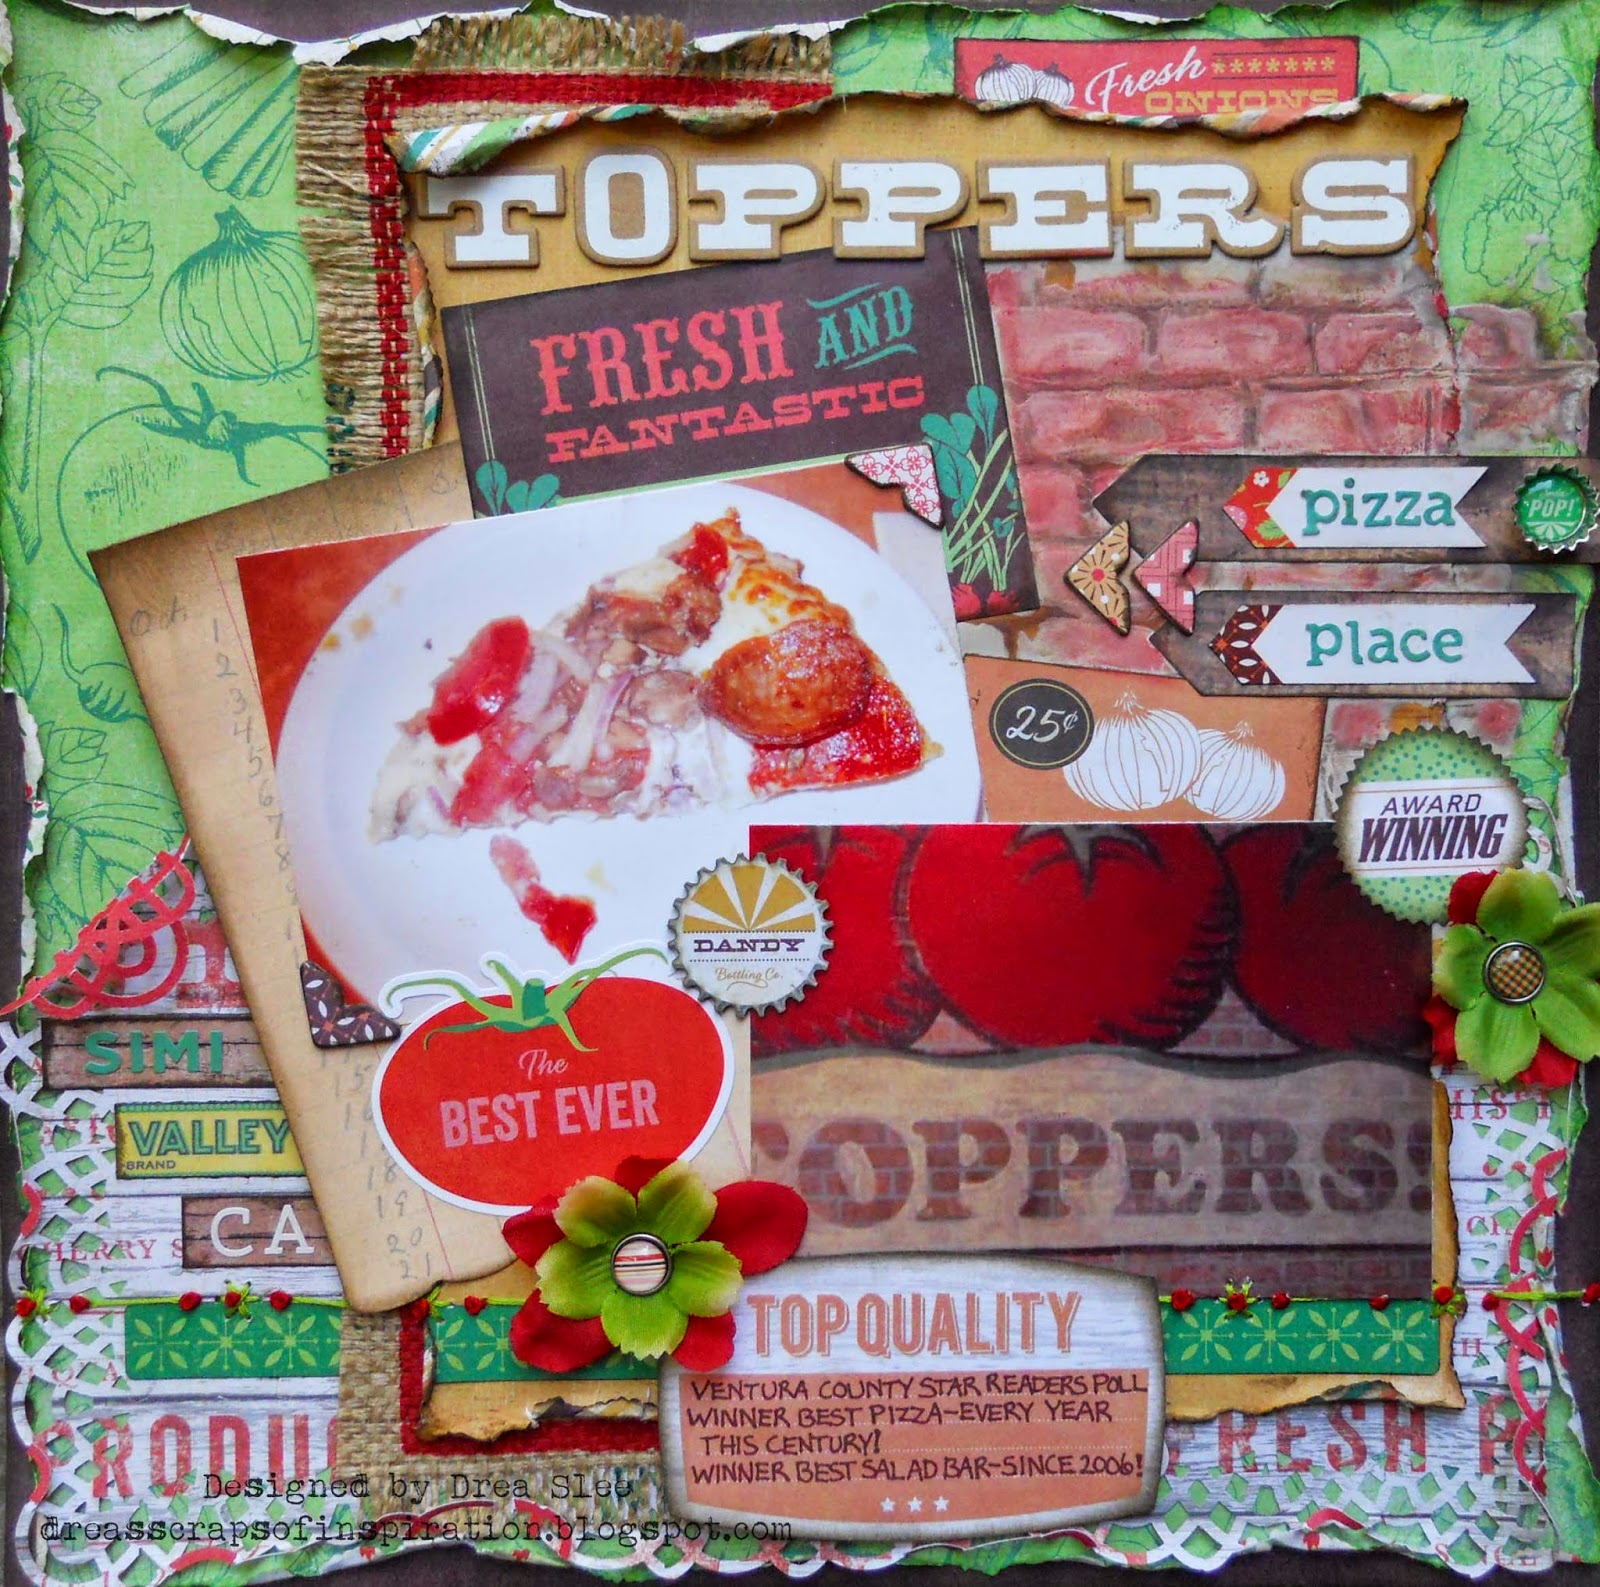
    Basic Grey's Herbs & Honey I want it all bundle from FotoBella is a fun collection of times past! To showcase some of the great vintage food advertisements and embellishments that come in the bundle, I scrapped these photos that my Mom took on a trip back to our hometown of my husbands favorite pizza place. In fact, he wanted me to put this away because it was torturing him just to look at it! Lol!


     The bricks were made with a stencil, gesso, and inks. I used a lot of stickers on here for the May Sticker Challenge @ Scrapbook.com, with the twist of using Alpha Stickers, which there's a whole sheet of in the bundle in six different colors, as well as the waterfall theme pack, which has two different colors. I used chipboard photo corners on the photo of the pizza, and as arrows next to pizza place, for category one of the May Four Categories Challenge, also @ Scrapbook.com. My favorite piece on here is the little green soda pop,  Bottlecap Sticker!


     The flowers are from my own stash, and I just added some brads to them. I also had to add the burlap, that came from an old feed bag that I got from my Mom a few years ago. I hand-stitched the border on the bottom using red french knots, which is the twist this month for the Sewing Challenge that I host, to represent tomatoes.


Thanks for looking!


Sunday, May 11, 2014

Herbs & Honey Jar of Flowers Tutorial ~ FotoBella DT

   Happy Mother's Day to all you Mother's out there!! I instantly thought of my own Mom when I first saw Basic Grey's Herbs & Honey I want it all bundle from FotoBella, so I made her this card with a jar full of flowers that she can keep forever.


   I started with the back of the radish paper that's full of flowers. 


Fussy cut however many flowers that you want to use. I made a few too many, but saved them for another project.


Quickly dip your flowers in water and curl your petals up. You can wait for them to dry or give them a blast with a heat gun. 


Take the jar that comes in the Diecuts and Transparencies and place it where you want on your project. Don't glue it down yet, but trace around it using a pencil. I used a mixture of Alcohol Inks (Stream and Lettuce) with Alcohol Blending Solution, which lightens the colors, on the back of the jar to create water.


Now add some stems with a pencil inside your drawn jar. I hand-stitched mine with green embroidery thread, but if sewing isn't your thing, you could always use a green marker.


Now attach your flowers to the stems, and glue your jar down over them using Glossy Accents, which will dry clear.


The Seeds of Love packet, which comes in the Printed Kraft Bags, is the perfect size to add some cash or a gift card! Perfect for any Mother! Thanks for looking and enjoy your day!


Tuesday, April 1, 2014

Spice Market Memories ~ FotoBella DT

 The Spice Market I want it all bundle by Basic Grey is full of color, exotic patterns, and perfect for your most precious memories, like this photo that I scrapped of my Aunt and Grandma , taken a month before my Grandma's death last year.


   The papers in this bundle remind me of Spring, cotton fabrics, so I started this design with the intent of making a quilt block, which is the twist this month for the April Sewing Challenge that I host @ Scrapbook.com. I played with some triangles that eventually turned into a heart, and inked the edges with Distress Ink (black soot), then  finished them up with white machine stitching. I added a doily behind the photo and the sides of the heart, making sure to fussy cut the flower on the right so it can be seen. I also fussy cut the large flower, and added a button that I inherited from my Grandma. All of the buttons on here came from her, making this page extra special.


For all of your special memories I highly recommend the Spice Market I want it all bundle from FotoBella!
Thank for dropping by!


Saturday, March 15, 2014

FotoBella Sketch Challenge

   We have another sketch for you to try, for a chance to win an I want it all bundle from www.fotobella.com.

Deadline to submit your layout is March 31.

Here are a  couple of ways you can enter:

Upload your layout on our Facebook Challenge Page.

Or submit a photo of your layout on Twitter or Instagram by using the hashtag #FotoBellaChallengeMar2014

For bonus entries have your friends vote for your layout on Facebook, retweet your submit and sharing on all three of these sites. But don't forget to use 

....Also make sure to come back and comment on the FotoBella Blog that you have entered.


I just LOVE this older photo of my younger cousin Ashley! It's hard to believe she was in the same grade here as my son is now. 
I started this page by cutting out the flower in the center with an exacto knife. I then adhered the photo onto the back and hand-sewed the edges in red embroidery floss. The flower that I cut out has the red and white striped brad, and was colored with Prisma markers as well as the other big flower behind it. The bottom half of the layout has a light wash of Gesso to make the banner stand out, which was cut from different papers in the bundle. I stitched a circle over the banner using black and white embroidery thread. I finished it up with some chipboard for the title and the rest of the flower pieces. 

Here's a closer look at the flowers and the coloring that I did.


Thanks for looking! I can't wait to see your entries!

Friday, March 14, 2014

Spice Market Flower Tutorial ~ FotoBella DT

I absolutely LOVE the new Basic Grey Spice Market I want it all bundle from FotoBella!! It's so exotic and colorful, and packed FULL of papers and embellishments! After making a layout and this card it feels like I haven't even put a dent in it.


I started this card by cutting out the white (cumin) paper with some scallop decorative scissors and spritzing and splattering with some Glimmer Mists. I cut a 4" circle with my Cricut Expression from the red (paprika) paper and adhered the you make me smile sticker onto it. I cut a strip of black cardstock and punched it. To make it go around the circle I cut slits every 1/4" right up to the punching and glued it piece by piece behind the circle.

I made the flower out of a half sheet of the sea salt paper, some black soot Distress Ink, glue, scissors, and chipboard.

Directions:

1. Get out your sea salt paper and using a pencil and ruler, draw a straight line from the end of the red petal to the end of the black stem on both sides.

2.Cut and ink 5 petals using black soot Distress Ink.

3. Cut a small to medium circle from some scrap paper and mark the center with a pencil. Now curl up your petals and glue around the center slightly overlapping each petal as you go.

4. Repeat all the previous steps with the inner blue petals and glue them in between the larger petals.

5. Now just add a small piece of chipboard or even a brad or stud that comes in the bundle to finish it off.

Thanks for your visit!