Showing posts with label Shaker Card. Show all posts

Friday, January 24, 2020

Thank You Shaker Card

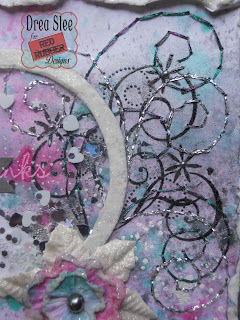
     Starting off the year with a thankful heart, expressed in this shaker card, which was actually my first project of 2020, even though I'm just now posting it!  


     I was inspired by the January 2020 Challenge at Lindy's Gang with this beautiful combo.
      

     The background was smooshed with Lindy's Gang Sprays (Brushed Nickel and Black Orchid Silver) and Magical Shakers
(Bavarian Blue and Stormy Silver). Then I gave it some splatters with LG (Sidewalk Chalk) Spray, before embossing the snowflakes and falling snow with LG (Purely White) Embossing Powder.


     The wreath was embossed with LG (Midnight Pewter) Embossing Powder, and colored with LG (Frosty Forest Green) Spray. Once dry, it also got splatters with LG (Sidewalk Chalk) Spray. 


     It's kinda hard to see in the photos, but I also embossed the snowflakes and falling snow with LG (Purely White) Embossing Powder onto the white cardstock of the shaker for some texture. The sentiment was done with LG (Cuckoo Clock Cardinal) Embossing Powder. Since I ran out of clear acetate for the shaker, I used the lid from my salad, and filled it with glitter. 


     Thanks for looking!

****************************


****************************
Challenges Entered:


The Funkie Junkie Boutique Blog ~ Repeat Performance (Salad Lid for Shaker Window)


Wednesday, June 5, 2019

Lotsa Dotsa Shaker Card ~ Red Rubber Designs DT

      It's been awhile since I've used the Lotsa Dotsa Stamp from Red Rubber Designs, and wanted to feature all of the fun circles on this card, made with Distress Inks to achieve an ombre effect, inspired by my Dad's beautiful blue eyes! 


     My design inspiration came from Stella Says Sketch Challenge #711.


     I started with white cardstock and my blending tool, to apply Distress Inks from the bottom with (Peacock Feathers), and worked my way up with (Mermaid Lagoon, Salty Ocean, and Blueprint Sketch) on top. Then I sprayed the long strip from the Lotsa Dotsa Stamp with water, and pressed it onto the center of my paper. A few more sprays of waters, and my ombre effect was done. Once dry, I hand-stitched the scallops, and stamped the sentiment with the Contemporary Greetings Stamp using Palette Ink (Starry Night).


     The white splatters were embossed with the So Splattered Stamp, using Lindy's Gang (Purely White) Embossing Powder, also used with the smaller circles from the Lotsa Dotsa Stamp.


     To keep with the ombre effect, I stamped the larger circles from the Lotsa Dotsa Stamp onto my white card base, using Distress Inks (Mermaid Lagoon and Blueprint Sketch), showcased in this shaker filled with small glitter circles, and sequins. 


     Thanks for stopping by, and shop for these stamps and more at Red Rubber Designs


***************************


*****************************
Challenges Entered:


CAS Mix Up ~ June Challenge (I used ombre, stamping, and heat embossing) 


Sunday, November 27, 2016

Mister Penguin Shaker Card ~ Red Rubber Designs DT

     When I saw this adorable Mister Penguin Stamp Set from Red Rubber Designs, I knew I had to use it for my son, who loves penguins! So I created this shaker card for him.


     I cut the scallop frame with my Cricut Expression, covered it with Snow-Tex, and placed some clear acetate on the back, along with a thin frame of double-sided foam tape to enclose the glitter. Then I created the background scene by embossing the Mountain Scenery stamp set with glitter, and adding a couple of snowy hills, covered with Stickles. Mister penguin was colored with markers and Distress Inks, with some Clear Wink of Stella on the black and white parts. The fun part was adding the metallic stars and Diamond Dust, and adhering the frame to the background!


    The snowflake strip was colored with Distress Inks (Tumbled Glass and Broken China) onto white cardstock with a blending tool. Then I sprayed my snowflake (Vintage Santa) stamps with water, and pressed them all over my paper. Once dry, I embossed the snowflakes in white, adding some circles from the Cheery Christmas stamp set, along with the other snowflakes that were embossed onto black cardstock. 


     I also embossed the Vintage Santa stamp set for my sentiment, which I placed on a kraft board banner covered with black gesso to look like chalkboard. I love the contrast against the sparkly red velvet ribbon!


     The tree was embossed in two steps, using the Oh Christmas Tree Cling Mounted Stamp, and topped off with a metallic star from the shaker. I can't wait to give this to my son!


Thanks for looking!

**********************************


Challenges:


Thursday, January 14, 2016

Many Thanks Shaker Card ~ Red Rubber Designs DT

     I'm ringing in the new year with some new products, and a new technique, with my very first shaker card! I had so much fun with this, I'm actually working on another one now!


      I've combined lots of misting, stamping, and hand-stitching on this card that I made for my in-laws! For details, and to see the whole card, please visit the Red Rubber Designs Blog!


   **************************************