Showing posts with label nature layout. Show all posts

Friday, February 13, 2015

Water Under the Bridge ~ Red Rubber Designs

     Happy Friday the 13th! Here are some photos that I scrapped on a hike through the Eagle Falls trailhead, in Lake Tahoe, CA.


     The February mood board at Scrap Around the World inspired this paper that I made from white cardstock. The design inspiration came from Sketch #132 at Sketchabilities.


      I masked some leaves and pine needles with some sprays, and then stamped the leaves using the  My Sunshine stamp set. Then I used a stencil with some white paint and brown ink. Over the white rings, I used white embossing powder with Autumn Swirls. For part of my title, I used Alpha-Tiles stamped onto vellum. All of these stamps can be purchased at Red Rubber Designs.


     I'm also entering this into the February Four Categories Challenge at Scrapbook.com, for Category One, to use a wood embellie. I used wood embellies along with real bark from a pine tree, including two photos for the twist. The netting was recycled from some fruit, and the fiber around the circle photo came in a little bag with a sweater I recently bought. I still have a little left too!


Thanks for looking!


Thursday, August 22, 2013

Fishing on Father's Day

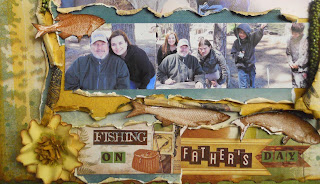
Now that this hectic month has finally settled down a little, I was able to play with my new Bo Bunny "Trail Mix" collection. This is my new favorite line from them at the moment, and love how it looks with these photos from Father's Day a couple of years ago. I just want to point out that I didn't do any fishing here nor do I ever! Lol!

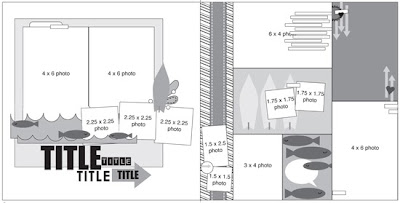
This is based off of this fun and creative sketch, done for the August Sketch Challenge at Scrapbook.com.It is also my entry for the August Color Challenge to use yellow, green, and brown with the twist of using nature photos. 

I started by masking the trees in the background using some mists. I inked and water distressed all of my edges. I used the cardstock stickers to make my title and for the journaling stips on the right. The fish were cut out from pp and then applied with Glossy Accents to make them shiny.
The flowers were left over's from my handmade stash that I altered a bit from the original. I thought I had made a tutorial for them, but I guess not, since I couldn't find them. The green Petaloo vines were a RAK from Flying Unicorn. Thanks Alda! 

And thank YOU for stopping by!

Wednesday, July 24, 2013

Berry Blossom Tutorial

"Grow" is the theme this month at Once Upon A Sketch,  and what better way to show growth than with the beauty of new blossoms on the trees, like the ones I captured here, while on a walk around my neighborhood a few Springs ago.

I was instantly inspired by this sketch and will probably use it again.

This also my entry for the Photo Inspiration Challenge at BOAF. I have so many paint swatches and used strips of them behind the photo. The red rose below the journaling and the circles in the centers of the larger pink flowers are rub-ons that I've had for years, making this my entry for the Four Categories Challenge. I started this page by masking the doily on the upper left, and using the actual mask as a stamp for the doily on the bottom right.

I used a real doily which I inked, cut a circle from the center with scallop scissors, and then cut it in half. The largest flower was stamped, embossed, inked, and fussy cut from white cardstock.

I used a light pink vellum to print my journaling on, and glued it behind this scallop wood veneer, which like the rest, were sprayed with Lindy Stamp Gang mist. The doily behind that was stamped just like the one in the upper right corner, but with different colored inks.

Now to make the Berry Blossoms! I used my Cricut (Serenade cartridge) to cut my flowers from white cardstock. Cut 2 flower 5's at 2" and 2 plant 3's at 1 1/2".

I used Distress Ink (picked raspberry) and my blending tool to color the flowers pink.

Then I dipped my flower into water and starting in the center I folded and crumbled it. I opened it up and while it was still wet I used my Distress Ink (aged mahogany) to go over the edges and the lines that I just made by crumbling it.

Once it's dry, layer your 2 flowers together with some glue. I use Aleene's Fast Grab Tacky Glue.

To make the centers, use Distress Ink (seedless preserves) and your blending tool to color the tips leaving the middle white.

Now curl your tips up and over using the end of a paintbrush or some tool to help curl your petals.I used a rub-on tool.

Then glue your centers together like this.

For the center I used this circle rub-on that I've had forever, but you could use bling, buttons, brads, or whatever you'd like.

For my smaller blossoms I used pink puffy paint for the centers. Here's a close-up of them both finished on my page.

Thanks for looking!