Monday, May 28, 2018

Memorial Day Layout ~ FotoBella DT

     Never forget the men and women who have died, while bravely serving our country's armed forces! This Memorial Day, I'm honoring my late uncle, who served in the Army, with this page that I scrapped of him, featuring Prima Marketing's Rust Pastes from FotoBella.com.


     My design inspiration came from Sketch #2, used for the May Monthly Sketch Challenge at Scrapbook.com.


     I started with a piece of black cardstock, and TCW Chickenwire stencil that I applied Prima Marketing Rust Paste (Camouflage Set) to, using all three colors from the set. Then I assembled the postcards and papers, cut and torn from Stamperia's Around the World 12 X 12 Paper Pad, and inked along the edges with Distress Inks.


     The key, chains, gears, and cogs were made with Prima Marketing's Black Gesso applied to the Stamperia Steampunk Mechanism Thick Stencil. Once dry, I used my fingers to rub on some Prima Marketing Metallique Waxes (Bronze Age, Rich Copper, Brushed Iron, and Old Silver), followed by Prima's Red and Brown Rust Pastes.


     The same steps were used on the large circle that I glued twine to, before coating with black gesso. Then I did some stamping and fussy cutting with Prima Marketing's Finnabair Stamps, adding Rust Pastes to one of the gears, and popping it up over the circle.


     The buttons belonged to my late grandma, some covered with Rust Pastes, along with the brads and anchor on the photo, that's finishing the hand-stitching.


     Thanks for looking, and check out all of the GREAT Memorial Day Sales going on at FotoBella.com!


*********************************
Challenges Entered:

Stamps and Stencils ~ Let's Fake It (I made faux metals and rust)


Thursday, May 24, 2018

Memories Canvas ~ Red Rubber Designs DT

     Have you ever had such a precious and meaningful photo, that you're afraid to scrap it? My mom, who rarely ever asks me to scrap photos for her, actually printed and gave me this photo many months ago, of her and her dad, who passed away a few years ago from Alzheimer's, to get to whenever inspiration strikes. Finally putting my fears aside, I decided to mount it on canvas, using a variety of stamps from Red Rubber Designs.


     The newspaper that my grandpa's standing on in the photo, inspired the text that I stamped over torn strips of white tissue paper, with the Well Defined Backgrounds and Define It Rubber Stamps. Then I adhered them with Prima's Soft Matte Gel, covering the sides as well. Once dry, I aged it with some Lindy's Sprays (Brushed Nickel and Black Orchid Silver), followed by a coat of Emerald Creek's Fractured Ice EP to seal the strips, and for some sparkle and shine.


     After tearing around the edges of the photo, I adhered it to the center of my canvas. Then I framed half of it, using black gesso and a stencil, also followed by a coat of Fractured Ice EP. Next, I used my fingers to dab over the stenciling, and rest of the raised texture from the tissue paper, with Prima's Brushed Iron Metallique Wax. The Dusty Attic corner chipboard piece, was made from a combination of all three (black gesso, Metallique Wax with the addition of Old Silver, and coated with Fractured Ice EP). All of the flowers were embossed onto white cardstock with the Charcoal Flowers Cling Mounted Rubber Stamp, and shaded with Hickory Smoke Distress Ink.


     Since the title was embossed over all of the texture that I created, using the Memories Unmounted Stamp, it came out faded and illegible, all three times, but is fitting for the horrible disease that my grandpa suffered from. All of his broken and fragmented memories are represented by the Prima Frosted Mica Flakes, that I adhered one by one, with Glossy Accents around the rest of the canvas and photo.


     I'm happy to say that mom was beyond thrilled with the results!


******************************************


Challenges Entered:


Red Nose Day Layout ~ FotoBella DT

     Today is Red Nose Day, which is a campaign started to end child poverty. Funds raised support programs to keep children in need safe, healthy and educated, by getting and wearing your official Red Nose at Walgreens. So I'm celebrating with a layout of my adorable nephew, using an older Basic Grey Herbs and Honey Bundle from FotoBella.com.


     He's loving strawberries right now, so I spritzed Worn Lipstick Distress Spray Stain onto the background, to mimic the mess he made of his shirt. Then I applied Mowed Lawn Distress Ink with my Blending Tool, onto the edges of the green papers, and the fruit die cut below.


     The tag, scallops, and strawberry are stickers from the bundle.


     Finally I added his red nose, using Bo Bunny's Double Dot Ruby Red Jewels. Such a cutie!


     Thanks for looking, and shop by color at FotoBella.com to find all of your RED needs! Happy Red Nose Day!


Sunday, May 20, 2018

KaiserCraft Misty Mountains Layout ~ FotoBella DT

     With cool, soothing colors, featuring beautiful floral and geometric patterns, the KaiserCraft Misty Mountains Scrapbooking Bundle isn't just for the mountains! So this time, I made a layout for the FotoBella Design Team, to showcase this gorgeous bundle from FotoBella.com.


     To some of the paper edges, I used my Blending Tool, to apply Distress Inks, (Chipped Sapphire, Dusty Concord, and Seedless Preserves), including the blue floral die cuts that I popped up for dimension. 


     I also used the same Distress Inks to blend onto the punched edges, to create an hombre effect, before adding a couple of border stickers.


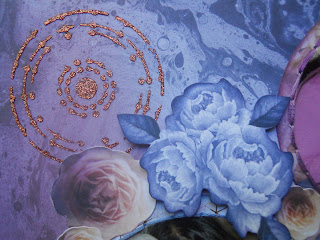
     For a touch of sparkle, I used a couple of stencils with Bo Bunny's Copper Glitter Paste, to match some of the metal accents in the collection.


     Thanks for looking, and get your KaiserCraft Misty Mountains Bundle at FotoBella.com!


Thursday, May 10, 2018

Blossoms Mother's Day Cards ~ Red Rubber Designs DT

     Are you ready for Mother's Day? I have a couple of cards to share with you, featuring the Blossoms and Blessings, Victorian Vines, and Contemporary Greetings Unmounted Rubber Stamps from Red Rubber Designs.


     I started by smooshing some Distress Inks onto white cardstock to create the colored backgrounds. Then I stamped the flowers and leaves with the Blossoms and Blessings Stamp, colored the centers with Distress Inks, and gave them a coat of Stickles.


     For the sentiment, I used the Contemporary Greetings Unmounted Rubber Stamp.


     Then I stamped the floral backgrounds with the Victorian Vines Unmounted Rubber Stamp.


     I also added some punchwork, which adds to the elegance of these, along with some machine-stitching.


          Thanks for stopping by, and shop for these stamps and more at Red Rubber Designs!

***************************************


************************************
Challenges Entered:


Saturday, May 5, 2018

Fiesta Striped Painted Blanket Tutorial ~ FotoBella DT

     Happy National Scrapbook Day and Cinco de Mayo! I'm back with a tutorial, inspired by these two holidays, featuring Dyan Reaveley's Dylusion's Paints from FotoBella.com.


**********************************
    Supplies:

White Cardstock
1/4" Masking or Artist's Tape
Tim Holtz Stripes Stencil
Tim Holtz Arrows Stencil

Directions:


1. Cut a piece of white cardstock to measure 10" X 12". Place masking or artist's tape, 1.5" from the top. Then place another strip an inch from the first one, alternating between 1.5" and 1" all the way down. If you're using masking tape, like I did here, make sure to get rid of some of the stickiness first, by placing onto clothing or carpet, so it doesn't rip the paper when peeling off. 


2. Use fingers to blend Dylusions Paints onto each masked strip. From the top, I started with Cut Grass, blending into Fresh Lime. On the next strip, I used After Midnight, blending into Calypso Teal. Then Postbox Red, blending into Tangerine Dream, and ending with Squeezed Orange, blending into Lemon Zest. Repeat the colors again, starting with the green strip, until finishing up with the red at the bottom.


3. Carefully remove the tape, and don't worry if your lines aren't crisp. As you can see, mine weren't.


4. Apply black gesso to the Tim Holtz Stripes Stencil mainly over the white stripes, and lightly dab the backside of the stencil everywhere else.


5. Apply black gesso to the Tim Holtz Arrows Stencil onto white cardstock, and fussy-cut them, adhering two to the top, and one on the left side of the page. Hand-stitch the sides with white embroidery thread.


6. Apply black gesso to the center of the page before placing photo. Adhere buttons using black and white embroidery threads.


7. Use finger to blend Black Marble Dylusions Paint into White Linen Dylusions Paint, over Bo Bunny's Lasercut Chipboard spelling Celebrate.


8. A couple of fun die cuts finished off this page, including the blue confetti piece that I painted with After Midnight Dylusions Paint.


Thanks for stopping by!

**********************************
Challenges Entered:

Try it on Tuesday ~ Stencils/Diecuts  (I used 2 of each)


Thursday, May 3, 2018

KaiserCraft Misty Mountains ATC's ~ FotoBella DT

     Everyone could use a little love and encouragement, and the KaiserCraft Misty Mountains Bundle from FotoBella.com, has a great variety of words, quotes, and sentiments, that can easily be added to any project! So I made a set of ATC's to feature them, with a tutorial on the FotoBella Blog.


          Thanks for looking!