Tuesday, June 30, 2020

Hello Kitty Layout

     Hello and happy Monday! I'm finishing out the month with this fun layout featuring some shaker doors that I made. 


     I wasn't sure if it would be done in time for the June Challenge at More Than Words, but looks like I barely made it. As you can see I was completely inspired by the moodboard! Lol!


     I started with the bricks, done with a stencil and white gesso mixed with Lindy's Magicals (Rowdy Rizzo's Red and Cuckoo Clock Cardinal) applied to a sheet of black cardstock. Once dry, I painted the same Magicals onto the bricks, along with Lindy's (Autumn Maple Crimson) Spray. Then I lightly embossed it with Ranger Brick (Antiquities) and Distress (Aged Mahogany) Embossing Powders, and gave it touches of white gesso.


     I used to LOVE Hello Kitty when I was a little girl, so these photos taken on vacation last December in San Luis Obispo, California, were perfect to showcase the word HELLO! The chipboard letters started out black, so I covered them with white gesso, and embossed them with Ranger Mixed Media Powder (Scarlet). KITTY was also covered with white gesso, and then painted with Dylusions (London Blue) Paint. I painted the dot in the exclamation point with a mix of Dylusions (Pure Sunshine and Lemon Zest) to match her button, and made them all shine with Lindy's (Clearly Clear) Embossing Powder.


     It felt good to use up this last piece of Bazzill Chipboard that I've had forever, and already had a coat of white gesso on it! So I embossed it with Emerald Creek (Silver Sparkle) Embossing Powder.


     The doors were cut from a recycled cracker box, and given a coat of white gesso. Then I painted them with Dylusions Paints (Crushed Grape, Lemon Zest, Pure Sunshine, and Polished Jade). For the woodgrain, I used the Finnabair (Trust the Magic) Stamp with Ranger (Jet Black) Archival Ink. The knobs are made with a strip of the cracker box and a brad, covered with black gesso, and lightly embossed with Emerald Creek (Mirror Platinum) Embossing Powder. Aren't they so cute?


     The bottom layer of the shaker doors were made from black cardstock, shown through the fussy cut checkered stamp that was done on white cardstock. After cutting the windows from a leftover salad lid, and adhering them, I filled them with glitter, and stamped a border around the whole page. 


     Thanks so much for stopping by!

***********************
Challenges Entered:


Wednesday, June 24, 2020

Beach Bird Houses Tag

     Hello again! I'm back with a tag to celebrate Summer, and wishing I was one of these birds! Lol!


     The colors and images were inspired by the Lindy's Gang fun and fabulous June Color Challenge


     All of the stamping was done with the Hero Arts Basic Grey (Enjoy the Journey) Stamp Set. The leaves were stamped with permanent green inks and embossed with Lindy's Gang (Clearly Clear) Embossing Powder


     To create a lagoon, I added some ripples to the rest of the tag with white gesso, and painted the top with LG (Ocean Breeze Blue) Spray. Since I didn't have the right shade of green in my sprays, I combined (Yodeling Yellow and Lederhosen Laurel) Magical Shakers with water, and blended that with more yellow towards the bottom. Voila! I DID have the perfect green! After a few more coats of color, I went over the whole tag with Ranger Multi Medium Gloss. 


     The houses were made from some old Kaisercraft and Bo Bunny scraps, and adhered and coated with Prima 3d Matte Gel. They started out much lighter, so I deepened the colors with the same sprays and magicals, and gave them texture with Prima Patina Effect Pastes (Mint Green and Blue) and (Dusty) Rust Effect Paste. For some more dimension, I raised up the house on the right with a piece of cardboard. 


     The birds are from the Bo Bunny (Serendipity) Collection. Two were fussy cut, and the one flying is a diecut. I adhered colored feathers to them (yellow, pink, and blue) with Prima 3D Matte Gel, and deepened the colors again using Lindy's Sprays (Poincianna Red Flame and Ocean Breeze Blue), with that perfect mix of Magical Shakers (Lederhosen Laurel and Yodeling Yellow).


     The flowers were embossed with LG (Tannenbaum Green Gold) onto white cardstock and painted with LG (Poincianna Red Flame) Spray. That Magical green combo was used for the leaves, with (Yodeling Yellow) in the centers. I also used the magical mix for the feather, which started out yellow, and was first given a spray of LG (Sea Mint Green). 


     A scrap of cardboard was used along the bottom. To mimic sand, I added Prima (Dusty) Rust Effect Paste and Mini Art Stones, and of course some shells.


     I finished the edges of the tag with some white gesso, and backed it with white cheesecloth. Then I dyed some strands of the cheesecloth with LG Sprays (Ocean Breeze Blue and Poincianna Red Flame), and again that mix of Magical Shakers (Lederhosen Laurel and Yodeling Yellow) to top it off. 


     Thanks for your visit, and take care! 

Challenges Entered:


Sprays: Ocean Breeze Blue, Sea Mint Green, and Poincianna Red Flame


Tuesday, June 23, 2020

Embossed Butterfly Card

     This embossed butterfly card would work in ANY color combination, and has a great textured background made from tissue paper and specialty threads!


     To start with, I adhered white tissue paper to a piece of white cardstock using Ranger Multi Medium Gloss. I went over it with the gloss, added 3 strands of green, blue, and silver specialty threads, and crossed them to make an X, while curving the pieces as I glued them. You can add as many threads as you want, with no sewing required! 


     After drying and trimming around the edges, I simply sprinkled it with Lindy's Gang Magical Shaker (Bavarian Blue), sprayed it with water, and let it do it's magic! Then I embossed the Kaisercraft Buttefly Stamp from the Pen & Ink Collection with Emerald Creek (Midnight Sky) Embossing Powder, also used around the card base, and on the bottom half of the sentiment. The top part of the sentiment was embossed with EC (Topiary Green) Embossing Powder. Finally, I painted the butterfly with Lindy's Gang Sprays (Afternoon Delight Denim and Cathedral Pines Green) and curled up the wings.


          Thanks for your visit and hope you're doing well!

************************
Challenges Entered:


Saturday, June 13, 2020

Let there be LIGHT Art Journal Page

     During these difficult times I wanted to spread light and love through this art journal page, to all of the cities of the world! 


     I was completely inspired by the June Challenge at Creative Embellishments, and used the Tiny Fairies, Moon Fairies, and Vintage Lantern chipboard pieces, along with the Independence Day and Medallion Stencils! This is my second project using their chipboard, and it's nice and sturdy, as well as the stencils, which really took a beating here, with all of the paint and Unicorn Effect Paste that I used. 


     I started with an old sheet of sky paper, adhered and covered with Prima 3D Matte Gel. Then I centered the Medallion Stencil, and masked off four parts with masking tape, before applying Art Alchemy Sparks Paints (Magical Pond, Mermaid Sparkle, Butterfly Spells, Ginger Magic, and Dragon's Eye) and Metallique Paints (Pure Sunshine, Fresh Orange, Romance Pink, and White Pearl). I waited for each quadrant to dry before going to the next, leaving my stencil in place, until adding the Unicorn Effect Paste. I was so impressed with how easy it was to clean afterwards! I've paid more than double for some stencils that are so flimsy, they wouldn't have survived this page. Lol!


     For the twist, I made the buildings and fairy outfits from lace dyed with various Distress Spray Stains. The buildings were adhered onto black cardstock with Prima 3D Matte Gel, and some of the windows painted with Art Alchemy Paints. Then I hand-stitched around them with various colors of embroidery threads. Before gluing them down, I used a scrap of the same square mesh as a stamp, dipped into black gesso, onto the background. 


     All of the fairies were given a coat of black gesso, and embossed with Ranger Rainbow Sparkle Embossing Powder. Then I adhered some dyed lace pieces with Ranger Multi Medium Gloss, topped with Finnabair Unicorn Effect Paste, along with the wings. 


     The other fairy wings were painted with Art Alchemy Paints (Butterfly Spells and Romance Pink) before adding the Unicorn Effect Paste. 


     I also used Unicorn Effect Paste through the Independence Day Stencil. Once dry, I went over it with some Distress Inks, also used to mask the title. 


     The lantern was given a coat of black gesso, and embossed with Emerald Creek (Turkish Bronze) Boho Blends and Ranger (Verdigris) Embossing Powders. Then I backed it with a clear piece painted with the same Art Alchemy Paints. 


     Thanks for looking, and stay safe!

***********************
Challenges Entered:


Monday, June 8, 2020

Altered Shell Tin

     Even though we got hail and rain here in Reno yesterday, Summer IS coming, so I took out my shells and altered this metal tin that measures 2 1/2". 


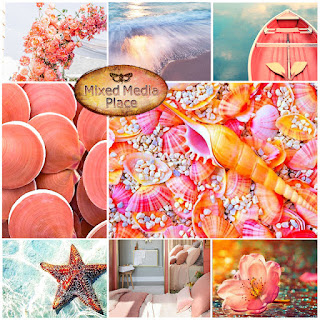
     I was inspired by the colors, shells, starfish, and water from the beautiful moodboard for the May 2020 Challenge @ Mixed Media Place!


     Since the silver tin was shiny, I lightly went over it with  sandpaper, before covering it with white gesso, so it won't peel off later. Unfortunately I learned this the hard way on a recent project, that I had to redo because I skipped that first step. Then I cut a 2 1/2" circle from a used dryer sheet, and adhered it inside of the tin with Ranger Multi Medium Gloss, creating ripples and texture with the end of my Prima Double Sided Texture Paintbrush. I also added the gloss to Art Alchemy Sparks (Mermaid Sparkle) to create a glaze, before painting the inside with two coats. To highlight the ripples, I painted over them with Art Alchemy Metallique (White Pearl) Paint, which really brought the water to life. After adhering the shells and starfish, I added some Prima (Pearl) Glass Glitter. 


     To protect the clear lid, I placed a 2 1/2" circle on top, before adhering the small shells and covering them with white gesso. Then I used Prima 3D Matte Gel to apply Prima Mini Stones in between the shells. Once it all dried, I painted it with Lindy's Gang Magicals (Hi Maintenance Magenta, Tears on my Pillow Tangerine, Bling-y Blonde, and Cuckoo Clock Cardinal), also used on the larger shells. After a few coats, I went over it with some touches of white gesso. 


     The outer part of the tin was done by creating a wavy texture with the end of my Prima Texture Brush, using Ranger Multi Medium Gloss, and adding it to my paints as a glaze. At first I repeated what I did to the inside, painting it with Art Alchemy Sparks (Mermaid Sparkle). But even after highlighting the texture with (White Pearl) paint, it felt like it was competing with the inside, so I went over it with a coat of Art Alchemy Sparks (Black Raven), followed by another coat of (Mermaid Sparkle) and touches of (White Pearl). Much better!


     Thanks for your visit! 

*******************
Challenges Entered:


Friday, June 5, 2020

Prom 2020 Mini Album

     A few months ago, when my Son told me his Senior Prom was going to be March 7th, I thought it was strange to be having it so early. But then the state of Nevada went into quarantine the very next weekend, so I'm so happy and thankful that he had that experience, unlike so many others during these times. He had such a great time, so I wanted to preserve those memories for him in this 6" X 6" mini album. Part of his graduation gifts, which was just a couple of days ago, and one that he will always cherish! 


     The original accordion album was old and ugly, so I covered it with a coat of black gesso and Emerald Creek (Black Cherry) Aroma Embossing Powder. The chipboard letters also got black gesso, and were embossed with EC (Midnight Sparkle) EP.


     I was so pleased with my first order @ Creative Embellishments, and my first project was this 2020 Shaker, window included! After coating all of the pieces with white gesso, the back piece was embossed with EC (Midnight Sky) EP, and the sides and top pieces with EC (Silver Sparkle) EP. Then I filled it with blue and silver confetti. Silver Sparkle Embossing Powder was also used on the base with the pearl, super glued over a metal flower, with silver elastic cording to hold it all together.  


     Now for the inside! The first two pages were made with some sprays and a stencil to replicate ripples, embossed with Emerald Creek (Fractured Ice) EP. 


     The wooden camera was covered with black gesso and Finnabair Metallique Wax (Old Silver). 


          I used EC (Midnight Sky) Embossing Powder again on the date, and paper edges behind the middle photo. 


     A staple was added to the ribbons. 


     The next two pages were also done with sprays (Lindy's Afternoon Delight Denim and Blueprint Sketch Distress Spray Stain).


        The stars were done with the Tim Holtz (Falling Stars) Stencil using Dylusions (After Midnight) Paint with a Mini Blending Tool. 


          Then I used the same paint to mask a strip of drywall tape across the bottom. 


     To add more photos, I made some tags with pockets made from black cardstock and the Tim Holtz (Stripes) Stencil, embossed with EC (Silver Sparkle) Embossing Powder. 


     Both tags were covered with colored tissue papers, and stamped with the Prima (Art Daily Planner Collection) Stamp Set, embossed with Emerald Creek (Onyx Frost) and (Hammered Metal) Embossing Powders.


     The last two pages are on the back. 


     Lots of stamping and stencil work on these pages, with EC (Silver Sparkle) Embossing Powder around the edges and matting a couple of the photos.


     The chipboard music note had been in my stash for awhile, and was previously painted with glossy black paint. 


     Thanks for looking, and hope you're doing well!

***************************
Challenges Entered: