Friday, January 11, 2013

Tissue Paper Flower Tutorial

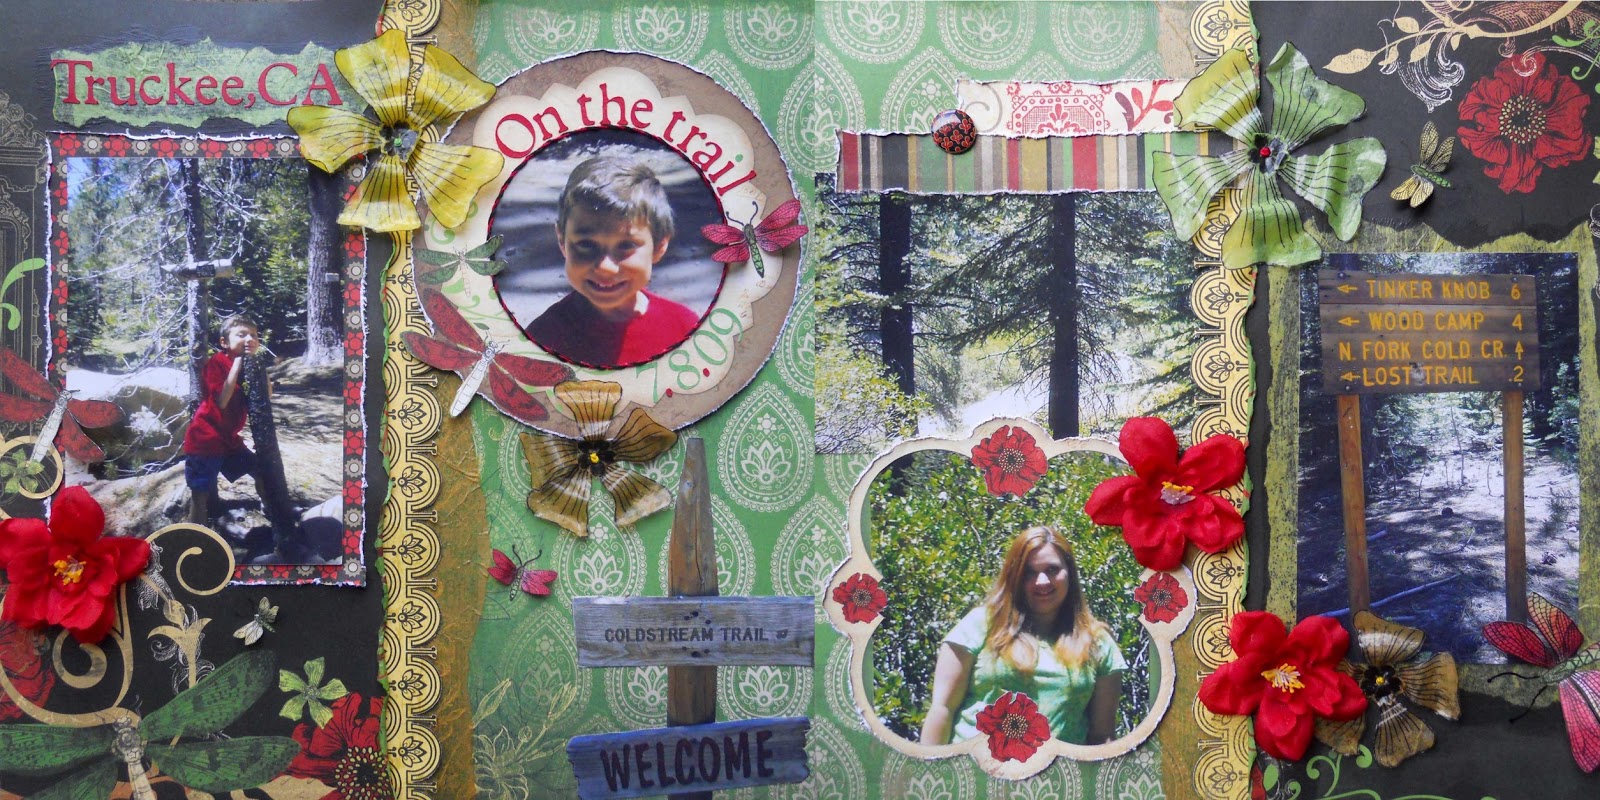
   I hope you're all getting ready for a great weekend! I'm just staying warm and cozy, while enjoying the surprise snow that we're getting right now. I wanted to share another 2 pager that I made for the January Color Challenge at Scrapbook.com to use red, green, and yellow, and for the Pass the tissue challenge at Flying Unicorn. I knew I had to do this challenge, since I have a whole box full of tissue papers that I've had since junior high. Every Christmas the box gets fuller, so I decided to use green, yellow and a kraft color to add to these beautiful Bo Bunny papers (Serenade). But the real challenge, for myself, was figuring out how to make flowers from tissue paper, which at one point I almost abandoned.
This was the first one that I made.

Here's what you'll need.
Tissue Paper
Decoupage Glue
Foam brush
Wax Paper
Scissors
Small Flower
Permanent ink
Black ultra fine point Sharpie
Scraper or old credit card
Paintbrush
Embroidery thread and needle

Directions:
Start by drawing your flower onto tissue paper. I started by drawing a small circle with a pencil, and drew 5 petals coming out from it. If you're not comfortable drawing, then try using a flower stamp instead. Just make sure to use a permanent ink, so it doesn't bleed when you add the glue. Once you get the outline of your flower made, go over it with your black Sharpie, but don't outline the circle. Using the circle as your guide, draw lines coming out from it. Now you can erase your pencil marks.

Carefully cut out your flower.

Now use a small flower stamp for the center. I used Bo Bunny's Serenity Stamps.
I then cut around the flower leaving a little bit of the green tissue showing around the edges.

 Using a foam brush I applied the decoupage glue onto the flower and smaller stamped one, using wax paper on the bottom.

Using my scraper, (you can also use an old credit card) I gently lifted the flower off of the wax paper, to prevent it from sticking too bad. If you wait for it to dry then it'll be harder to peel away and you'll be left with glue around the edges that you'll have to trim.

After that dries, apply another coat. Now use the end of a paintbrush to shape the petals.
After that dries apply a 3rd and final coat, reshaping your petals if necessary. While the glue is still wet, put your stamped flower in the center.
I finished it off with a french knot, but if you don't know how to make one, you can also use a small bead or make a dot with puffy paint.
That's all for now. Have a wonderful weekend!
Monday, January 7, 2013

Bright Button Flower Tutorial

I'm back with my first LO for the year, along with a very quick and easy flower tutorial, inspired by the papers I used, which are all My Mind's Eye (On the bright side).
I used this awesome sketch from Paper Haus Magazine and turned it into a 2 pager. 
I did LOTS of machine stitching on here, except for the hand stitching I used to hang the banners. Twine is so popular now, but it's really easy to stitch your own. Just follow these directions on my tutorial for Twisted Stitching. Here's a closer look at the banner and stitching. 

Close-up of the journaling.
Here's the flowers that I made, inspired by the paper in the background.
All you need is some patterned paper, scissors, ink, glue, buttons, and embroidery thread. The first step is to cut out 2 circles by hand, in a medium and small size. As you can see my circles are far from perfect, but that's what  you want. 
Now cut small triangles almost to the center of your flower.
Then ink around all the edges.

Curl your petals up.
Glue the smaller flower on top of the larger one, and add a button. I also used embroidery thread on my buttons, but that's up to you. 
So quick and easy! Thanks for looking!
Drea

Monday, December 31, 2012

Hawaii Mini Album

   Before the new year starts, I wanted to share this mini album I made for my sister Irene, and her boyfriend John. John's back home visiting family in Ireland, so wasn't able to see this yet. Merry belated Christmas and Happy New Year to you and your family! If it wasn't for you John, I'd probably still be pestering Irene for these photos. Lol!
   I made this album from their recent trip to Hawaii from brown paper bags, using rafia to bind it. Here's the cover.
Here's the first 2 pages. I used my Cricut (Life is a beach) cartridge to make the lettering, bamboo, and palm tree. I used real sand and glue to cover the island.
Pages 3 and 4. Using the same cartridge, I cut the palm fronds.
Pages 4 and 5.
Pages 6 and 7. Thanks to Flying Unicorn for the white flowers! I won them from a challenge there a few months ago.
Pages 8 and 9. I was at this same beach when I was just 14. I can't wait to go back with my husband!
Pages 10 and 11.
A close-up of the tiki masks I cut with my Cricut. Also using (Life is a beach) cartridge.
Pages 12 and 13. More Cricut cut outs.
I made the flowers using my Serenity Blooms Tutorial. I just inked the orange onto white paper first.
Pages 14 and 15.
Pages 16 and 17.
The end! Have a safe and Happy New Year's Eve!!!

Wednesday, December 26, 2012

Mom's Mini Album

I hope you all had a wonderful Christmas! I was so happy to get a few inches of snow on Christmas night! I went to my parents on Christmas Eve, and gave my mom this mini album that I made from paper bags and some very old Bo Bunny papers. I just LOVE the button on the cover, which is an old one I inherited from my Great Grandmother! I've just been waiting for the perfect project for it. I still have a few more of them too. I glued some velcro under it to use as a closure.
The pictures are from my parents trip to Las Vegas and to visit my Mom's Dad for her birthday. They stayed in Vegas with my brother and his son, who's on the right. Isn't he a cutie?
They ate at a Mexican restaurant for her birthday, and not in Mexico. Lol! Behind the flower cut-out on the left I stamped her age.
I used some lace, flowers, and buttons to do these pages of my Mom and Grandpa, who I miss dearly!!!
These are the last 2 pages of the album.
Here's the back. Mom loved it!!

Thanks so much for stopping by!
Drea


Tuesday, December 25, 2012

Merry Christmas

Merry Christmas to all my scrappy friends, followers, and fans! Thank you so much for your support!

Sunday, December 16, 2012

Winter Fun 2009

Lately, I've been a busy little elf working on some Christmas presents for family. I'm still hoping to finish them in time, but this little round mini album was the first project I started the season with. I made this for my youngest brother, his wife, and 2 boys. Since I already gave it to them yesterday, I thought I'd share it with you. I used some older Bo Bunny papers (Tis the season), which I still LOVE! The whole album is made from round chipboard, which was another first for me.

I wasn't sure how to lay out my papers since I've never done a round album before. I probably should've made it so you can see the 2 pages together when opened but that's not how I did it. Next time I will though!

My son Logan and his 2 cousins standing in line waiting to see Santa.
Of course I had to do some hand-stitching!

SO easy to just make a bow with ribbon and call it a present!


I had so much fun working with circles and these festive papers! Thanks for stopping by! Happy Holidays!

Saturday, December 1, 2012

Holiday Magic~The Paper Mixing Bowl

It's reveal time again for the design team at the Paper Mixing Bowl! If you haven't checked it out yet, you should come take a look and join in the fun! We've just added 7 new talented designers to the team, and I'm looking forward to working with them. The December challenge is up and we are scrap cooking some Christmas Pudding, using the main ingredients for a bowl full of cherries (red, snow white, and evergreen). Here's my take, using photos of my son when he was just 4 years old.
Here's the recipe.
These are the utensils I used:
*Stick a bow on it-On my ornaments
*Use metallic elements- I used silver as an accent
*Stamping/embossing-I embossed the edges of the tops of my ornaments, and stamped and embossed my son's name and the year.
*Buttons, baubles, and bells (oh my)- I got buttons and baubles, but no bells. (Oh well)

Directions:
I journaled about a favorite holiday tradition, using the journalling prompts magic and tradition.

I did a lot of stitching on here, using red, green, and white for the twist this month for the December Sewing Challenge that I host @ Scrapbook.com.The outside border was hand-stitched using my twisted stitching technique, which in my opinion looks the best using red and white embroidery thread to mimic a candy cane.The rest of the stitching was done by machine, including my tree, which I topped with a masked star, using distress ink and stickles for some sparkle. 
I have lots of Christmas projects I'm currently working on, and can't wait to share them with you! Have a fabulous weekend!!!
