Sunday, January 31, 2016

Be Free Butterfly Tag ~ Red Rubber Designs DT

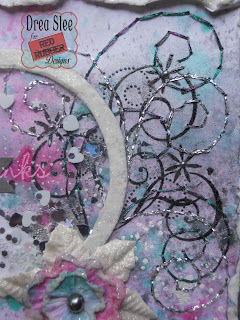
     I just LOVE color, and wanted to showcase my new Asian Butterfly stamp from Red Rubber Designs, by drawing the eye to the wings with some Distress Ink coloring, and some sparkle with a Wink Of Stella!   


     The tags were cut with my Cricut Expression, using the good old "George and Basic Shapes" cartridge onto white and black cardstock. Then I covered the smallest black tag with gesso and white paint, before stamping the butterflies and sentiment  ( Distressed Typewriter Bet) with black ink. The circles were masked with Distress Ink (Blueprint Sketch) and Stickles, using the Crafter's Workshop (Well Rounded) stencil. Of course I added some hand stitching, with some bling in the center swirls. Then I finished it up with some layers of punching and some ribbon on top!


************************************

Challenges:


The tags were cut with my Cricut Expression, and I used two different border punches on black cardstock.

Thanks for looking! 


Tuesday, January 26, 2016

Hearts Thank You Card ~ Red Rubber Designs DT

     I just heart my new Magical's by Lindy's Stamp Gang! I ordered them on accident, as I thought I was getting the sprays, and almost returned them when they came in the mail, but my curiosity took over, and I decided to give them a try. Now I must have them in all colors! Lol! That's what I was afraid of! Lol! Little magical jars of powder that I'm still learning how to use. But the very first thing I tried, of course, was stamping. With just a little bit of powder mixed with water, I applied them onto some hearts from the I Heart You stamp set from Red Rubber Designs, and just stamped them onto white cardstock that was misted with some blues first. I was really surprised at the intensity of the colors, and had so much fun creating this card!


     My design inspiration came from this awesome sketch used for this month's Card Challenge at Scrapbook.com.


     I also used my Magicals to stamp the arrow using the Elegant Arrows stamp set. Then I embossed "Thank You", and used Palette Inks for the rest of the sentiment. I was so happy to find that this fiber matched the colors perfectly, so I used it as a border, then added some machine stitching, twine, and a button to finish it up. It was so quick and easy to do!


*****************************************

Challenges:


Thanks for stopping by! 


Monday, January 18, 2016

Happy Birthday Shaker Card ~ Red Rubber Designs DT

     I recently made a shaker card for the first time, and immediately went to work on another one for my son's birthday next month. He's going to be 14, so I went with a more grungy look, with a space background on the shaker, using stamps from Red Rubber Designs!


     Starting with white cardstock, I applied gesso onto my diamond stencil,and let it dry. Then I sprayed some aqua and my new silver sprays on top, since aqua is my son's favorite color. Using a permanent black ink, I then stamped different phrases with the Be Happiness  stamp, and his birthday using the Mini-Bet stamp, which I also used with teal ink to stamp 14 in random spots.


    The circles on the background were embossed with the Background Soup stamp. I also embossed the Lotsa Dotsa stamp, and added some buttons in the centers.


     To create the large diamond on the background, I masked some drywall tape with black ink, added some embossing powder, and machine stitched two rows of stitching in metallic silver and teal threads. Then I made the background of the diamond shaker with black cardstock misted with a few sprays to look like outer space. To make the stars I embossed the Speckle Background stamp with silver embossing powder, as well as the sentiment, which was done with the Savvy Sayings stamp. I cut the frame from silver cardstock, where I also did some embossing using the Background Soup stamp, adding some brads in the corners. Behind the frame I added a piece of clear packaging, and attached it to the double sided tape along the background, after filling it with some glitter. So fun!!!


  ******************************************


*****************************************
      Challenges:


Challenge #9 Ring out the old, bring in the new ~ I used my new Lindy's Stamp Gang Sprays (Brushed Nickel and Black Orchid Silver) and embossing powders (Hyacinth Blue Jade and Queen Sheba's Silver) that I got for Christmas.


Letters and Numbers ~ Stamped various phrases all over the background, the sentiment, my son's birthday and the number 14.


Thanks for stopping by!!


Thursday, January 14, 2016

Many Thanks Shaker Card ~ Red Rubber Designs DT

     I'm ringing in the new year with some new products, and a new technique, with my very first shaker card! I had so much fun with this, I'm actually working on another one now!


      I've combined lots of misting, stamping, and hand-stitching on this card that I made for my in-laws! For details, and to see the whole card, please visit the Red Rubber Designs Blog!


   **************************************


Wednesday, January 13, 2016

Bo Bunny Love And Lace Mixed Media Heart Layout ~ FotoBella DT

     I'm really loving Bo Bunny's Love And Lace I Want It All Bundle from FotoBella!! This romantic collection was perfect for this very special page that I scrapped for my Mom of her late parents.


     The heart is made from stamped flowers that I cut and colored with the Bo Bunny Floral Stamp. For a step-by-step tutorial on how to make this page, please visit the FotoBella Blog!


Thanks for looking!


Thursday, January 7, 2016

Bo Bunny Love And Lace Valentine's Card ~ FotoBella DT

     Is Valentine's on your mind? Bo Bunny's Love And Lace I Want It All Bundle makes it so easy. I made this card for my husband combining the feminine and masculine touches from this beautiful and romantic collection!


     Most of the elements on this card were made from the 12 X 12 Collection Pack, including the belt that I made by cutting the leather strip, adding a couple of loops, and popping up the buckle. I also popped up the circle in the middle of the buckle that I got from the Noteworthy pack, adding a red button to it. The red rose on the heart also came from the Noteworthy pack, where I added some hand-stitching in burgundy and white. Then I stamped the floral cluster on top with blue permanent ink onto white cardstock with the Bo Bunny Floral Stamp, adding a smudge of Antique Linen and Frayed Burlap Distress Inks. I finished it up with some dots of Burgundy Stickles on the white lace.


Stop by FotoBella to pick up your own bundle! Have a great day! 


Friday, January 1, 2016

Bo Bunny Love & Lace Layout ~ FotoBella DT

     Happy New Year!! I hope you keep all of your resolutions, and have a happy and healthy 2016! Happy and healthy is just one of the reasons why I love this old photo of my late grandparents dancing together and looking so young and vibrant! It was just meant to be scrapped with Bo Bunny's Love & Lace I Want It All Bundle from FotoBella!


     I took my design inspiration from this fabulous sketch at Stuck?!Sketches.


     I tore and water distressed the edges of the papers in the 12 X 12 Collection Pack, and cut around the curvy lace paper to mimic movement from the photo. Then I hand-stitched the black zigzag in between the rips that I made in the burgundy "Cherish" paper. The black and white lace die that's behind the photo comes in the Noteworthy pack, where I added some black embossed flowers using Bo Bunny's Floral Stamp. The other flowers all come in the Ephemera, and I misted and layered them, inking the edges with Worn Lipstick and Aged Mahogany Distress Inks. The black metal flower and buttons on the smaller flowers also come in the Ephemera, and the other Buttons are chipboard. 


     For the titlework I did some fussy-cutting and tearing, adding "Always" from the Layered Chipboard.


Thanks so much for stopping by, and to pick up your own bundle stop by FotoBella