Friday, November 29, 2013

Read em and weep

I had a blast playing with my stamps on this page that I made from white cardstock, except for the black matting on the top photo of my Mom and Brother. I used 6 different stamp sets including the title, and used a toilet paper roll to stamp the circles on the bottom.

I was inspired by this awesome sketch #4 used for the Monthly Sketch Challenge @ Scrapbook.com

I tore diagonal strips of paper which were first colored with Distress inks and stamped in different patterns using Jet Black Archival Ink. I also splattered some black soot reinker throughout the page and onto the flowers. Here's a closer look at the journaling and some of the poker chips which were stamped and embossed using Ranger super fine detail black embossing powder.

Thanks for stopping by!

Viva Las Vegas Stamps! DT Tryout

I made a scrappy goal for myself a few years ago to start using my stamps more often, and I'm happy to say I've accomplished that goal. I love stamping on my projects, and even host a monthly stamping challenge at Scrapbook.com. I  had to apply when I saw the DT call for Viva Las Vegas Stamps, and what a huge and awesome selection of rubber stamps that they have. Besides the black cardstock behind the top photo, the rest of this page was made using white cardstock, inks, and stamps. I used 6 different stamps sets including the title, and even used a toilet paper roll to stamp the circles on the bottom.

This next page was also made with black and white cardstock.I stamped, masked, and inked the whole background, and stamped and embossed all of the flowers, except for the white ones. 

For this last page I stamped "enjoy the ride" on the yellow file sticker, and stamped and embossed all of the flowers.

Thanks for looking!

Friday, November 22, 2013

Boca Dam

   Hello scrappers! I'm sure you're all glad that the weekend is finally here. I've been fighting a pretty bad cold, but finally finished up this page that's been sitting on my scrap table all week. I used some old Bo bunny papers (Gypsy, Olivia, and Beautiful life) to scrap these photos of Boca Dam in Truckee, CA.


   I used bonus sketch A from the Monthly Sketch Challenge @ Scrapbook.com


   I made the umbrella from the Gypsy paper, adding stickles, bling, and stitching to it. It was so fun to make!


   The background was created with gesso onto kraft paper. I applied it with an old credit card and then used a comb to create the wavy lines. After it dried I used some mists over it (Lindy's Stamp gang ~ Tibetan Poppy Teal, Glimmer Mists ~ bahama blue and it's brown, and Perfect Pearls Mist ~ turquoise). It's kinda hard to tell in the photo, but in real life it's really sparkly and shimmery. I really love the teal/brown color combo, making this my entry for the Nov. 4 Categories Challenge @ Scrapbook.com for Category 2, to use these colors with the twist of some sparkle.
   I hand stitched the edges and stamped the large flower with the brown button. After stamping the petals, I used Prisma markers to color it in and then used stickles on the darker teal.

Have a fabulous weekend, and thanks for looking!

Thursday, November 21, 2013

Bo Bunny ~ Woodland Winter Brrrthday Card

I'm so excited to show you what I've been up to with my very first post as a design team member for Fotobella.com. I made this card from the fabulous new Woodland Winter I want it all bundle by Bo bunny. I absolutely LOVE this line, and honestly I'm still drooling over it!!

I was inspired by this sketch from Cardabilities. I started by cutting a rectangle 9" x 5" using the reverse side of Woodland Winter Mittens paper. From the reverse side of Woodland Winter Journal paper I cut a piece at 5' X 4 1/2", and distressed all of the edges using my Tim Holtz distresser.

Then I  used some gesso over the edges and immediately added some white glitter to it. I glued the pieces onto this same kraft cardstock that are in these photos, and folded it in half to make a card.

My next idea didn't come out the way I intended it to, but ended up being a happy mistake. I used a doily template on the bottom with a little too much gesso, that you couldn't even see the doily design except for on top, which I knew I would be covering. But because it looks like snow, I think it worked it out OK. As it was still wet I added the snowflake sticker that came in my bundle, and then added more of my white glitter.

Then I cut the diamond shapes out from the Woodland Winter Scarf paper. I inked the edges with some Distress ink (faded denim) and then outlined them with some Stickles (waterfall). I also used the Stickles to make the dots in the centers of the stars.

I wrote on the sticker  frame using a white pen,  and finished it off with the mittens button that I threaded with some white fiber.

Thanks for looking!

Thursday, November 7, 2013

Ferris Wheel ~ Glitz Design (Color Me Happy Collection)

   I just LOVE color, and what better collection to showcase a rainbow of colors than with Glitz Design's (Color Me Happy Collection)!

   As soon as I saw the mood board this month at Scrap Around the World I was immediately drawn to the colors, and was inspired to drip a rainbow of paint on my page.

   I also drew inspiration from their sketch, because what's a ferris wheel photo without some kind of circle design. Keeping that in mind I hand-stitched a circle with a rainbow of beads to mimic the lights from the ferris wheel.

This is also my entry for a few challenges at Scrapbook.com.
 November 5 Ingredients Challenge
1.orange
2.drops and/or drips - acrylic paints
3.matted paper-I matted my photo with black cardstock that I punched holes in.
4.banner with words
5.frame - After playing with my paints, I cut the chevron frame and placed it on my page,  before adding the gesso with my mini gears template on the left side of the photo.

November Four Categories Challenge for category 1 to use washi tape, with the twist to use it in 2 different ways. I have some under the photo and over it. I also used Fancy Pants Chalk tape to create the banner, and drew the letters on with a white pen. The leftover triangles that I cut from the banner were used to create the arrow pointing to yes, because I love ferris wheels and being up in the air!


Stamping Challenge that I host with the twist of embossed stamping, which I did to all of my flowers and the photo corner. I stamped "enjoy the ride" with black ink on the yellow file sticker that I cut on the bottom right. Here's a closer look at the flowers.

Thanks for looking!


Saturday, November 2, 2013

@ THE PARK ~ Bo Bunny (Trail Mix Collection)

   After receiving a stack of fabulous photos that my Sister-in-law took of my nephews, I knew that this was the one that I HAD to scrap, especially when I saw how perfect it looks with Bo Bunny's Trail Mix Collection.

   I was inspired by this sketch from last month's sketch challenge at Scrapbook.com. I just replaced the hearts with circles, but will probably use this again with the hearts, because I think it would make a beautiful wedding or Valentines page.

   The background gears were masked with Distress Inks (peeled paint and gathered twigs). The helm was cut with my Cricut Expression (Life is a beach cartridge), and inked with gathered twigs. I painted the "@" in the title with a cream acrylic paint to match the paper it's on. The dragonflies were stamped, cut out, and inked.

  After cutting out all of the circles, I machine stitched over them, and created a net like the one on the bridge in the photo. The curvy, uneven stitch lines make this my example with the twist, for the Sewing Challenge that I host @ Scrapbook.com. After all the sewing was done, I glued rope around the the circles.I finished up the page with a leaf and some buttons. Here's a closer look at the stitching on the bottom.

   I hope you're all having a great weekend! I'm getting ready to start on my next page.Thanks for stopping by!


Thursday, October 31, 2013

Saturday, October 26, 2013

Devil's night

With Halloween less than a week away now, I decided to scrap my photos from last year. I struggled a bit with choosing what papers to pick, since my son's red devil costume kept throwing me off. But I finally settled on some old Basic Grey (Indian Summer) and some red papers from even older lines, and this is what I came up with.

My starting point was this AWESOME sketch for the October 2 page Sketch Challenge @ Scrapbook.com. Isn't it cool? I'm sure I'll use it again!

I also wanted some flames on here, so I drew and cut out my own flame stencils, and used them with some Glimmer Mists on white cardstock. The tree on the left was cut out with my Cricut Expression (October 31st) and masked with some black Glimmer Mist. I inked the title with  Distress Inks (festive berries, spiced marmalade, and mustard seed) after cutting it out with my Cricut (Storybook) cartridge.


I used the same Martha Stewart border punch (Garden rail) on both pages, and finished it off with some hand stitching along the right.

Thanks for looking!

Saturday, October 19, 2013

Journey for a jacket

Happy Saturday! I hope everyone is enjoying the weekend. I just finished this page yesterday of me and my husband, and our journey to retrieve back our son's brand new jacket.

Journey was the topic for this month's challenge at Once Upon A Sketch. Here's the sketch that I was inspired by.

I started this page with the wrinkled background, which was white cardstock that I inked, wet and crumpled. Then I used a Tim Holtz clock mask with some Glimmer Mists (copper, harvest orange, and it's brown). I used a compass mask to create the scallops, which were embossed with Distress Embossing Powder in vintage photo. I used this throughout the page to give the illusion of rust, which is one of the colors for the October Monochrome Challenge @ Scrapbook.com. I included the twist of a cog with some of my masking, like on the clock that I cut out. The flower was made from some leftover parts that I had in my stash. I just misted it with the same colors that I used on the background, and added a brown crystal.

I cut the keys from some Tim Holtz paper and strung them through a chain, which I also covered with Distress Embossing Powder in vintage photo. I love how it really looks like rust, and used it on both brads, the journaling pages, the black alpha thickers, and over the black, grungy dotted, stamping.

I finished this page off with black stitching over the scallops, and the old wooden buttons that I recently inherited from my Grandma Norton. Here's a look at the journaling.

The first word on this page is "and" which is hiding under the brad.

And the last page.

Thanks for looking!!


Saturday, October 12, 2013

Spider Web Tutorial

Jeepers Creepers!!! I had a blast working on this Halloween page!

I took this beautiful sketch by Tammy for Flying Unicorn's Mojo Monday, and took it to the dark side.

This is my entry for quite a few challenges, including the Stencil me different challenge where we had to use a stencil in a different way. I used my Tim Holtz spider web mask to make the large spider web by spraying it like normal with some Glimmer Mists. Then after it dried I used a white pen to go over the whole mask. All of the spiders, the title, arm bone, and ghosts are stickers, used for the 4 Categories Challenge for category 1. To do something different with my stickers I used some mini alpha stickers by Lily Bee and masked them with some Distress Inks to make "creepers". Speaking of Jeepers Creepers, that's my song title for the October Music Challenge @ Scrapbook.com, with the twist of using orange and black. 

I love to recycle stuff on my pages, and used some old cardboard to cut a circle, and embossed it with Distress Embossing powders in vintage photo and brushed corduroy. Then I applied some moss that my Mom gathered for me in her backyard a few years ago. I finished the edge off with some yarn that was dyed orange with some Glimmer Mists that I already had in my stash. I added some orange bling to some cork from a wine bottle to make the skull eyes for this month's challenge at Scrap for help.
I made my fence with my Cricut Expression (October 31st) cartridge, cutting it out of black cardstock, and covering it with Distress Stickles in black soot. I also cut out the little tombstones to create a graveyard behind the fence.To mimic a foggy, spooky night, I used Pebbles Inc. white chalk coming up from behind the tombstones. The little spider web here was made in the same way as the larger one, except it only has 2 layers, and I used black soot Distress ink, instead of dusty concord.

To make the larger spider web you'll need some white cardstock, scissors, glue, a black brad, Distress inks, blending tool, and a white pen. I started by cutting these web shapes by hand in small, medium, and large. You're basically making a reverse scallop around a circle. 

Then I used my blending tool and Distress inks (peeled paint, spiced marmalade, and dusty concord) to color them. 

Now wet them and scrunch them up from the centers.

They should look like this after they're dried.

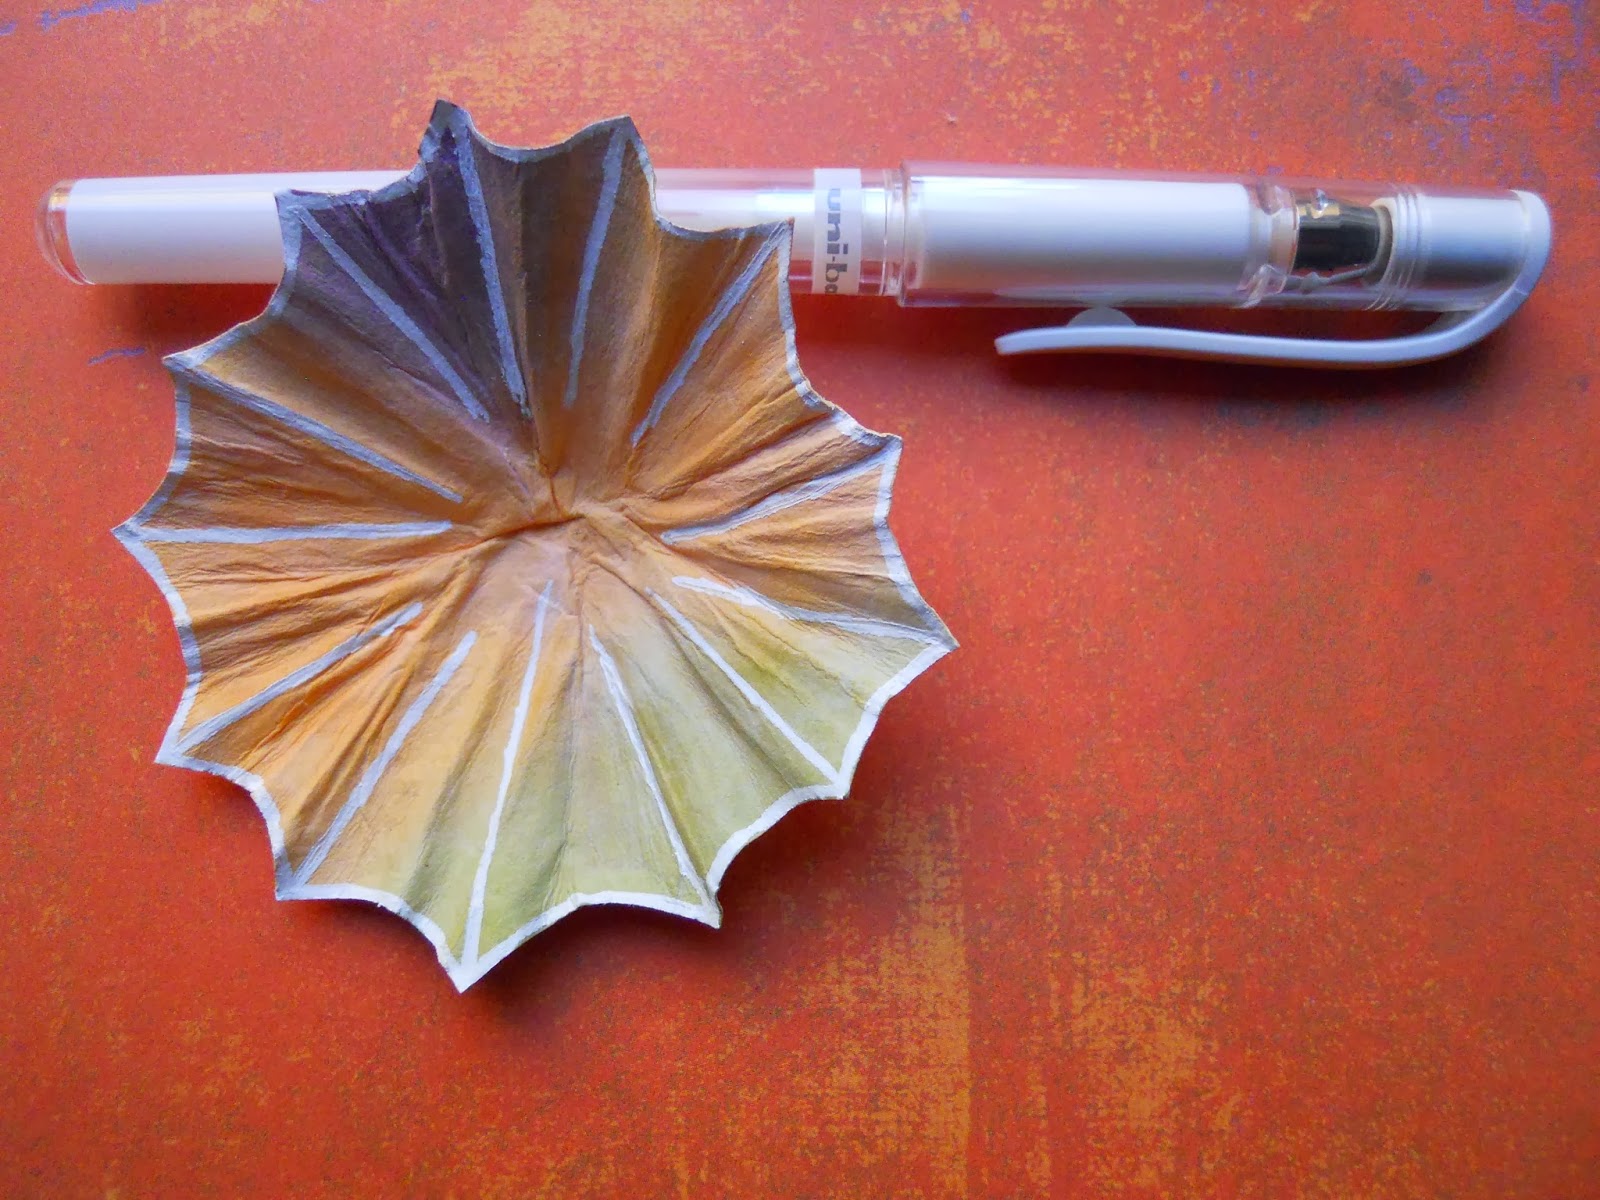
At this point you can darken your colors with some more ink, or leave it as it is like I did. Using my white   pen, I outlined the edges first. Then make lines coming from each point towards the center.

Now make connecting lines from all of your points, and continue down, but don't worry about making lines in the middle since it's not going to show anyway, since this is the largest web.


Only make your lines meet in the middle on your smallest web. They should now look like this.

Glue your webs together starting with the largest one on the bottom. I used my spider stickers for the legs, but you can use a black Sharpie to make your own. Then I added a sparkly black brad through the center, and finished if off by adding two dots for eyes with my white pen.

Thanks for stopping by!
Drea